# Paint System
Please Note
- Overview of the Paint System is shown here:.
Paint System overview
# Preparing The Paint
Before adding paint to the Turf Tank One it is recommended to shake the bottle (with paint) as good as thoroughly as possible in order to reduce the amount of sediments which may clog the paint tubes, filters and nozzle.
# Adding Paint
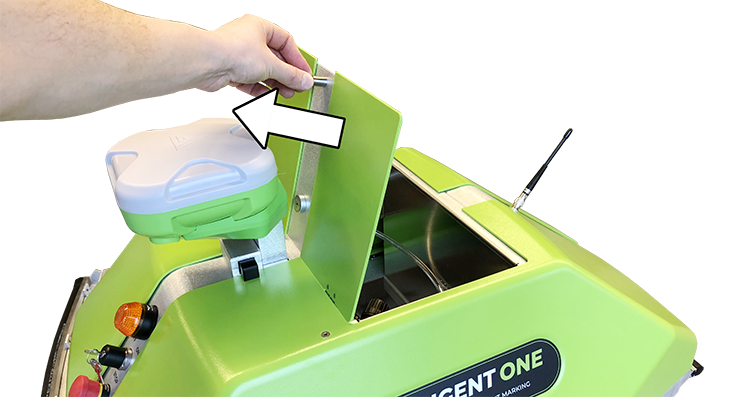
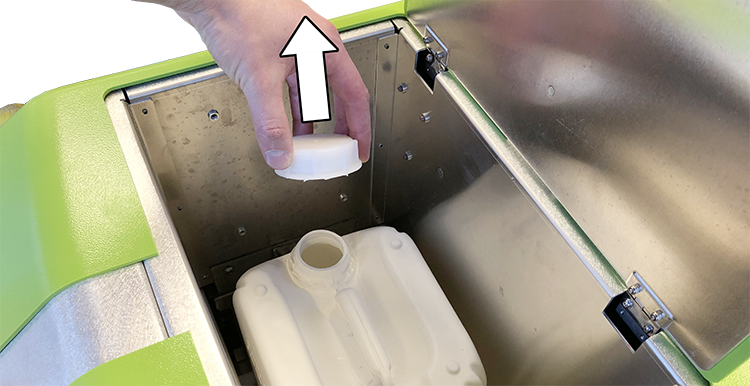
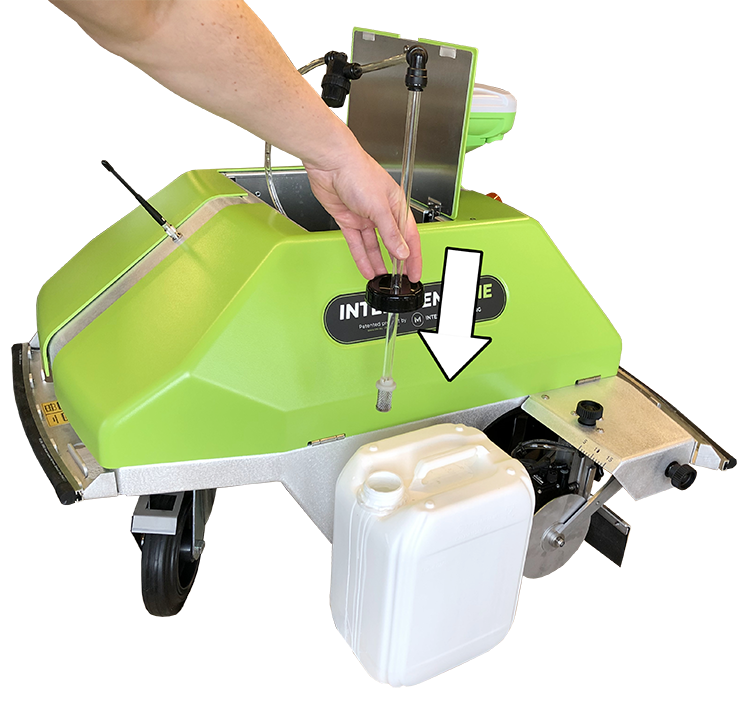
1. Open Lid for paint compartment.
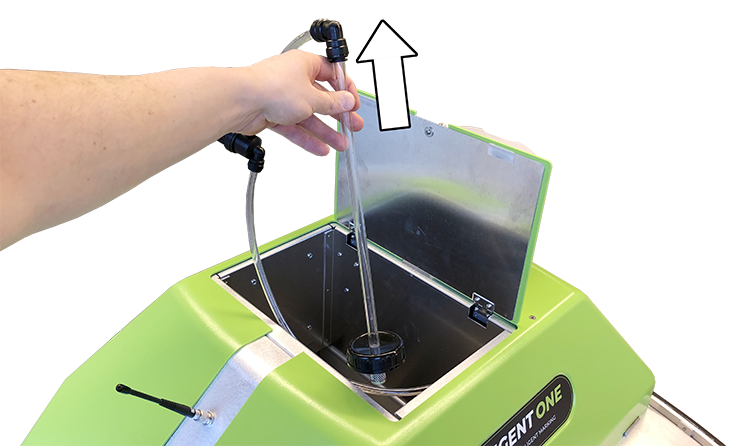
2. Move the paint tube of out the paint compartment.
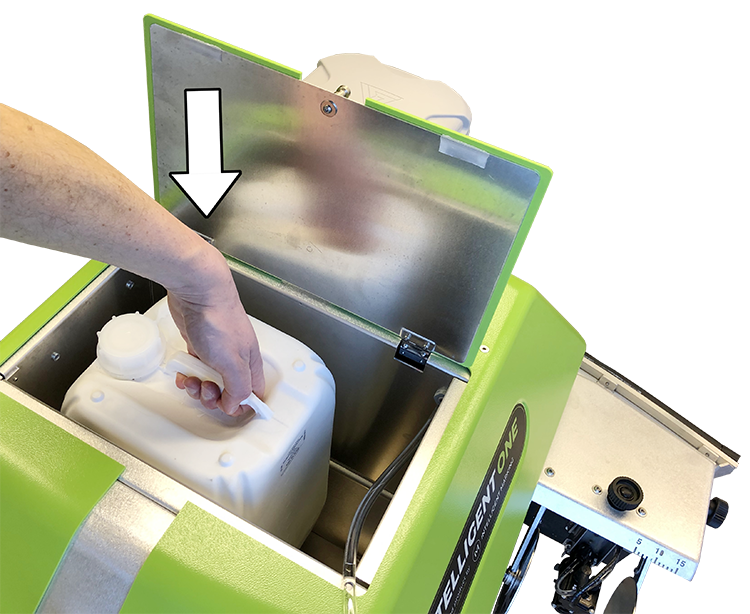
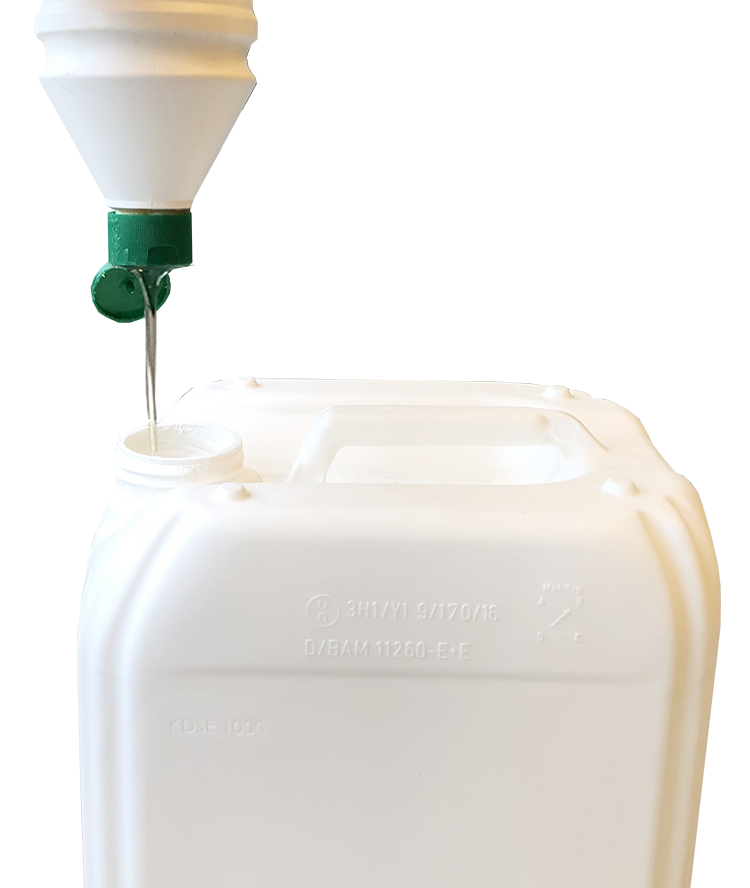
3. Insert paint bottle into paint compartment.
Have the bottle opening facing towards the Turf Tank One's left side.
4. Remove cap from paint bottle with a counterclockwise rotation.
5. On the paint bottle, mount bottle cap with tube.
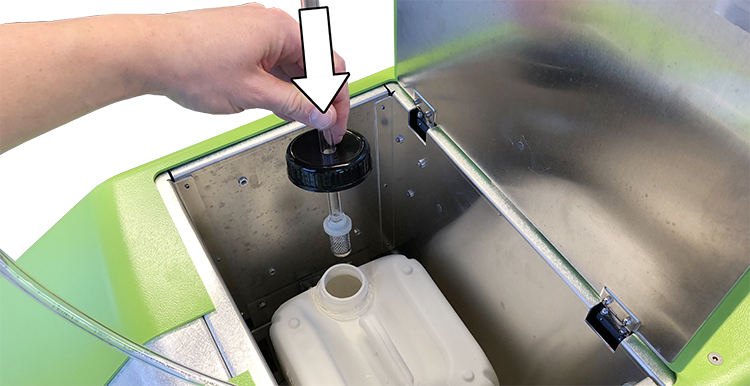
6. Tug the paint tube into the paint compartment.
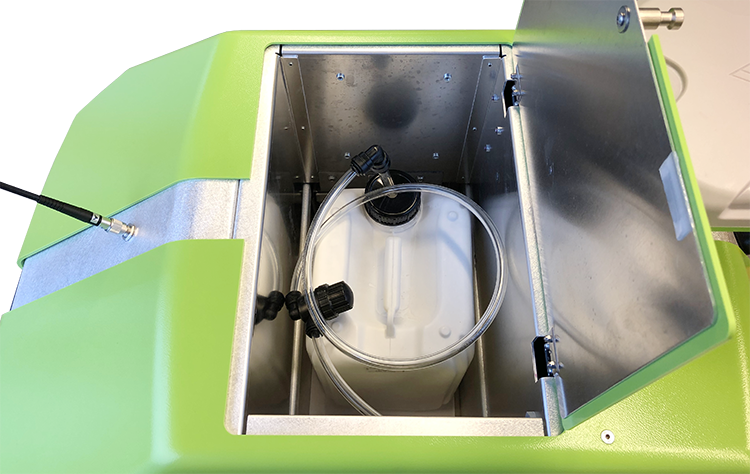
7. Close Lid for paint compartment.
# Bleeding The Paint System
Bleeding the Paint System is a process where air bubbles are removed from the paint system.
A line will not be evenly painted with air bubbles.
Please Note
- Paint needs to be added prior to bleeding the Paint System.
- How to add paint is described here:
Adding paint - Bleeding the Paint System is recommended to do outdoors.
1. Open the App.
2. Go to “Tool Management”.
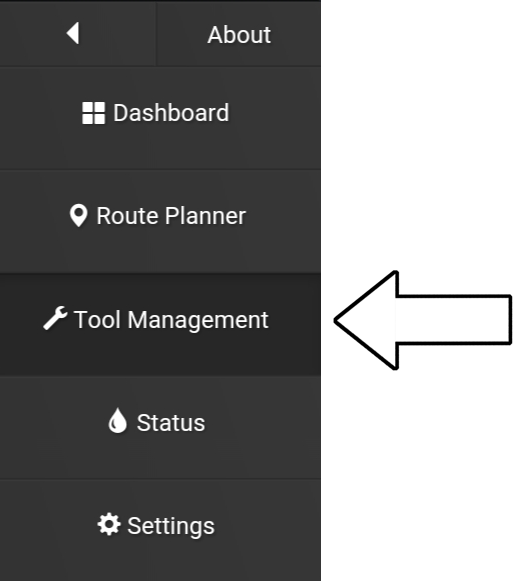
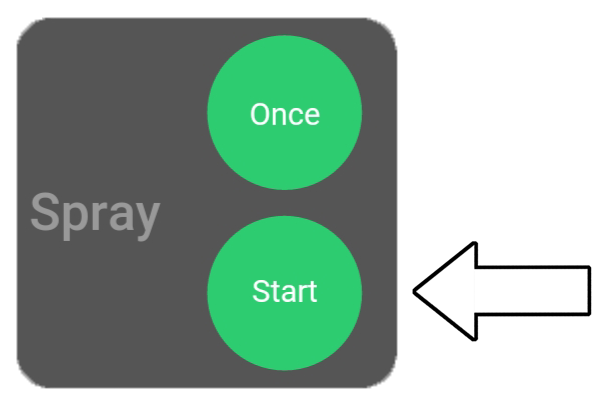
3. Press “Start”.
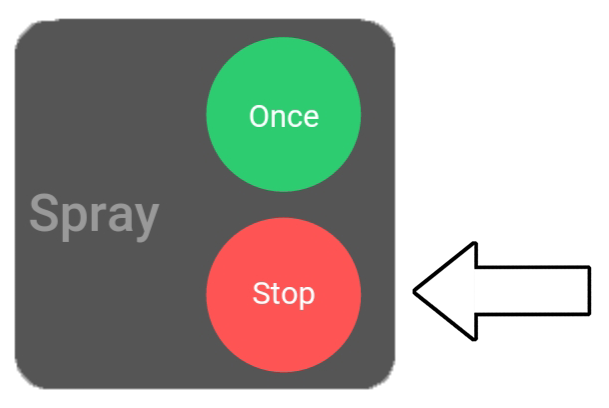
4. Press “Stop” when the paint comes out of the nozzle evenly.
# Cleaning The Paint System
To prevent paint from clogging up the tube system, the paint system needs to be cleaned after each use.
A minimum recommended clean procedure consists of the following:
- Rinse Paint System with water
- Rinsing the front filter
- Rinse filter in housing under hot tap water
- Clean the nozzle with water
# Rinse Paint System with water
Needed items:
- Clean empty paint bottle or regular bucket (minimum 5L or 4 gallons).
- Hot tap water.
- Dishwashing soap (optional).
Please Note
- Rinsing the Paint System is recommended to be performed outdoors.
- The Turf Tank One needs to be turned ON.
- The Tablet needs to be connected to the Turf Tank One.
- The Turf Tank One does not need to drive for this procedure.
- The Turf Tank One will use approx. 0,5L of water per minute (0,13 gallons per minute).
1. Add 4-5L or 1 gallon of hot tap water to a paint bottle or bucket.
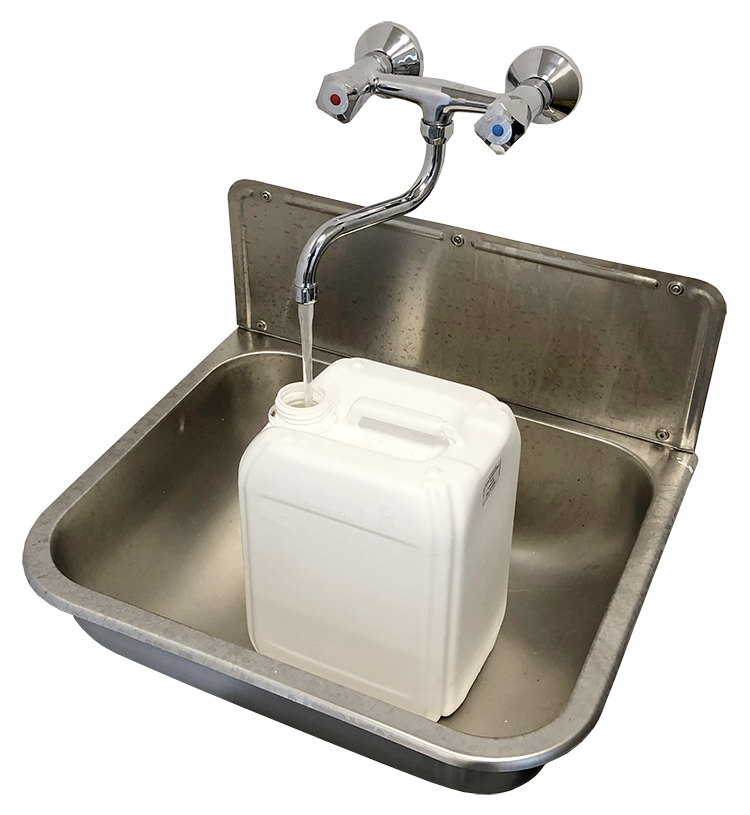
2. Add dishwashing soap to the bottle or bucket (optional).
3. Open Lid for paint compartment.
4. Move the paint tube of out the paint compartment.
5. Place paint tube into paint bottle (or bucket) with water.
6. Open the Tablet App
7. Go to “Tool Management”.
8. Press “Start”.
9. Let the Sprayer run for approx. 2 minutes and press “Stop”.
# Rinsing the front filter
Needed items:
- Hot tap water.
1. Remove tube from filter house.
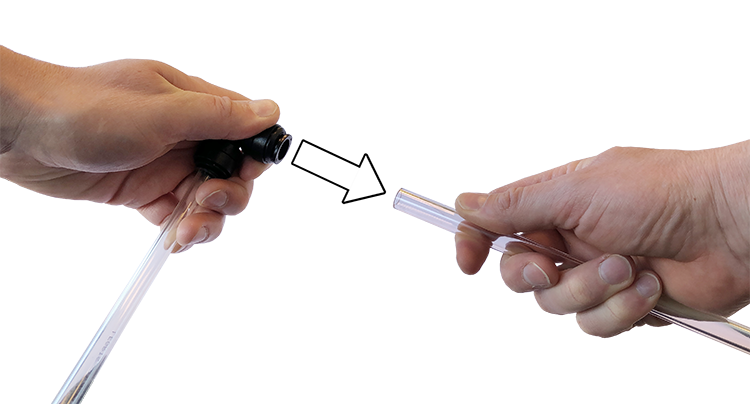
2. Clean the filter under hot top tap to remove paint residues.
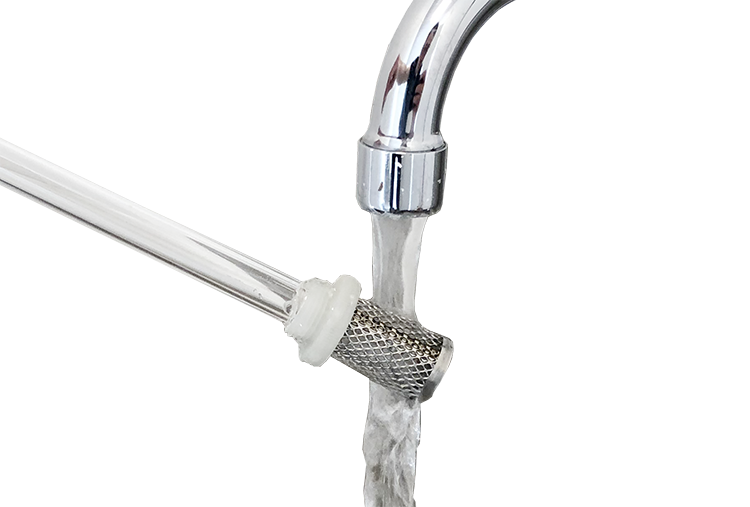
# Rinsing the mesh filter
Needed items:
- Hot tap water.
1. Unscrew and remove the cap with a clockwise rotation.
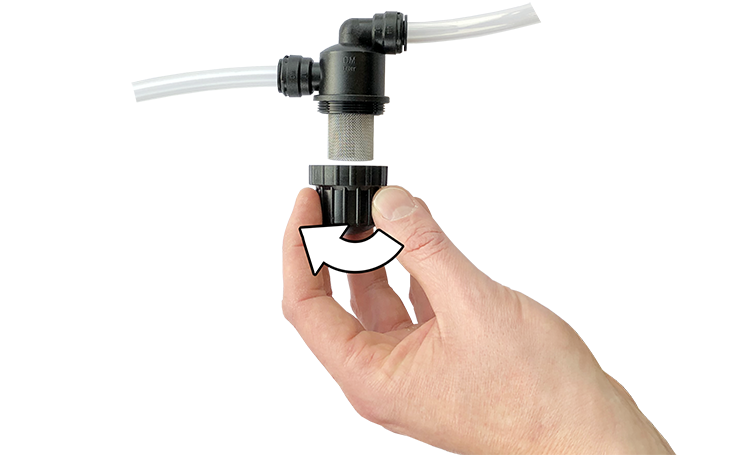
2. Remove the filter.
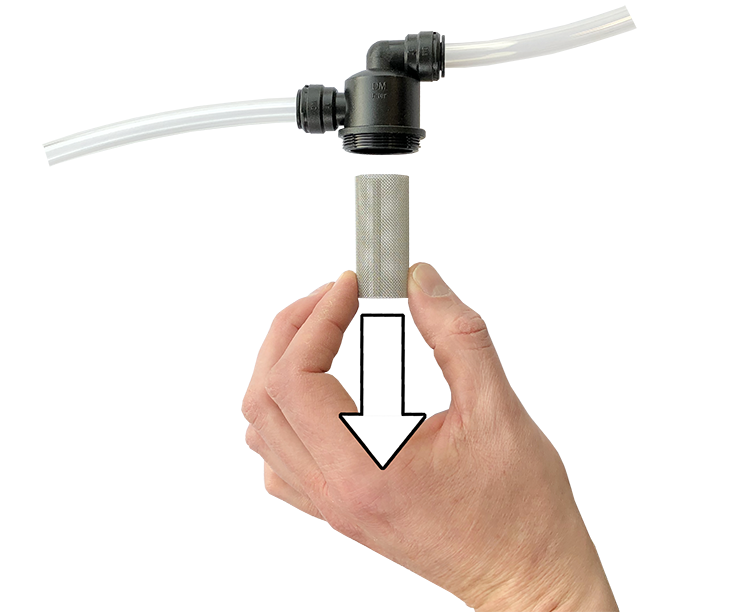
3. Clean the filter under hot tap water to remove any paint residues.

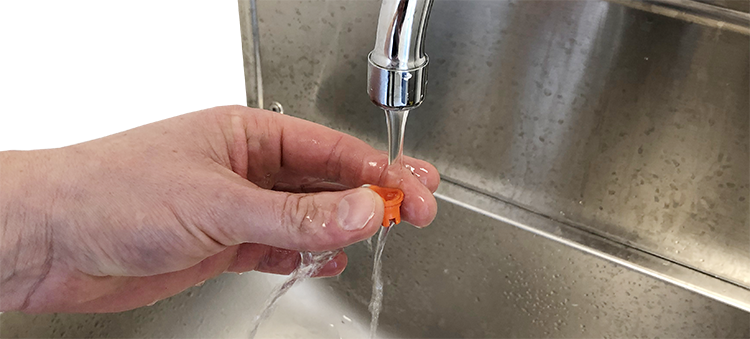
# Clean the nozzle with water
Needed items:
- Hot tap water.
- A regular glass.
- Dishwashing soap (optional).
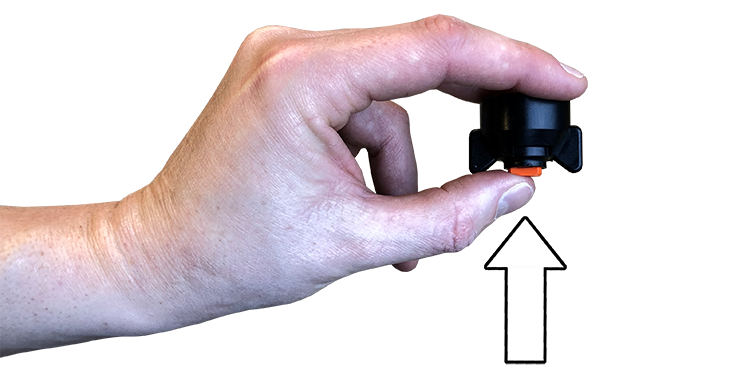
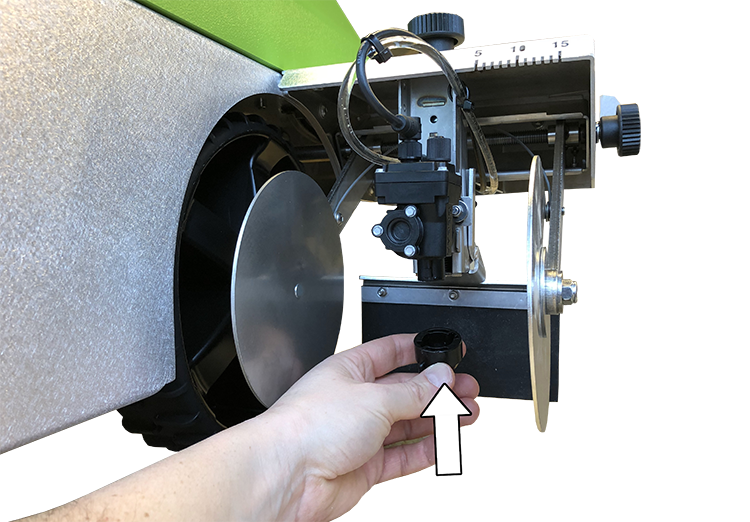
1. Remove the nozzle.
Removing the nozzle is described here:
Removing the nozzle
2. Rinse nozzle under hot water to remove any paint residues.
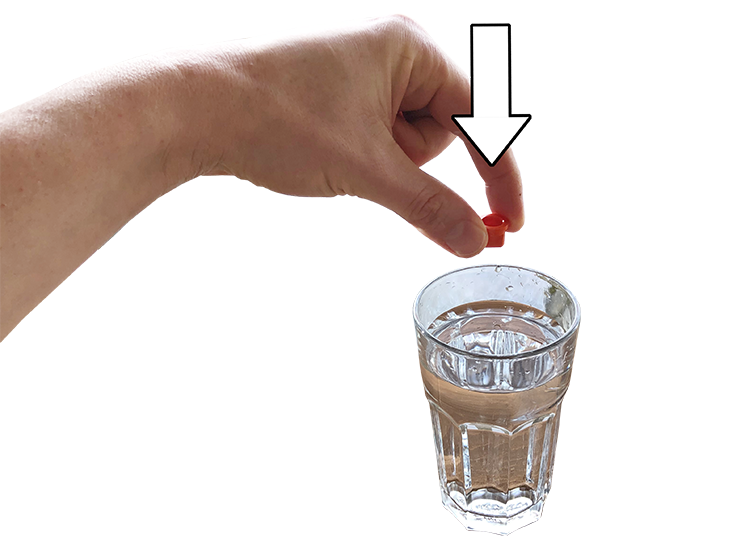
3. Put the nozzle into glass of water and let it soak.
Preferably, let it soak in water until the nozzle needs to be used again.
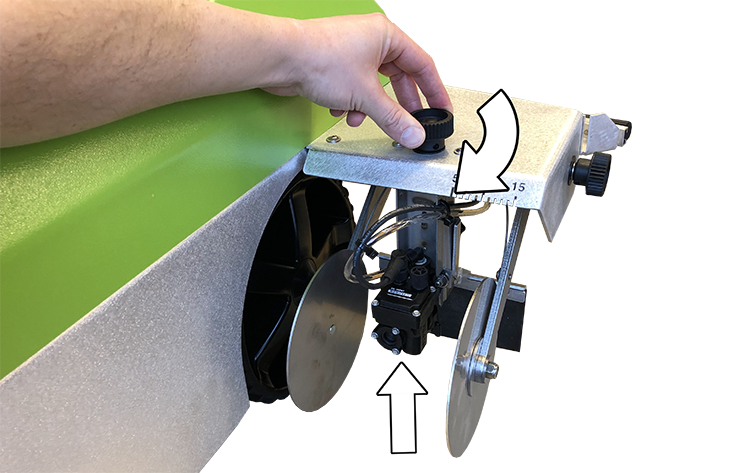
# Adjusting Spray Width
Spray width is adjusted by raising or lowering the sprayer module.
- Lowering the spray module decreases the spray width.
- Raising the spray module increases the spray width.
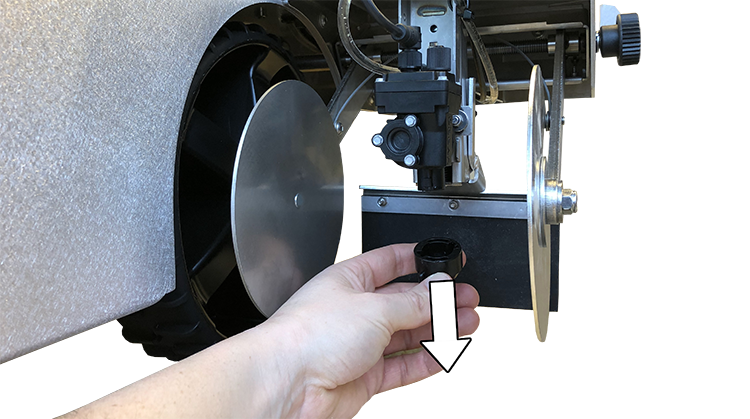
# Lowering the Sprayer
1. Rotate turn knob counterclockwise to lower the spray module.

# Raising the Sprayer
1. Rotate turn knob clockwise to raise the spray module.
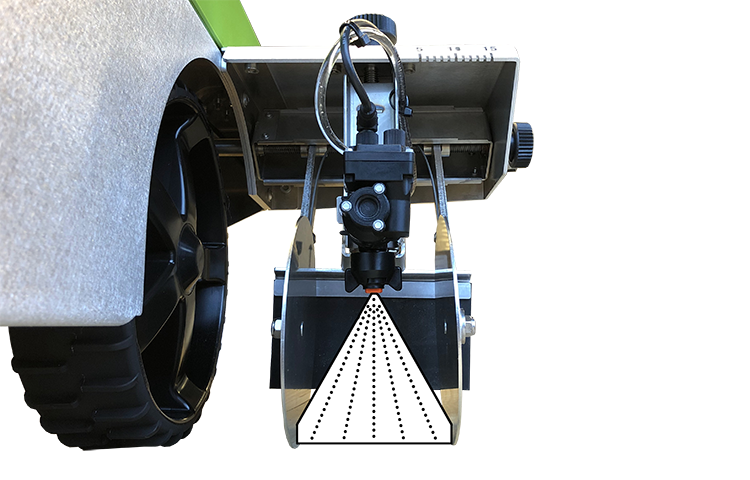
# Painting Sharp Lines
Sharp painted lines can be achieved by adjusting the width between the Spray Discs.
If the spray cone hits the Spray Discs high–– up, less paint will be applied to the painted line.
If the cone does not hit the Spray Discs, the painted line will be less sharp.
Width of the Spray Discs needs to be adjusted so the bottom of the spray cone hits close to the bottom of the Spray Discs. See illustration below.
How to adjust the distance between the Spray Discs is found here:
Adjusting distance between Spray Discs
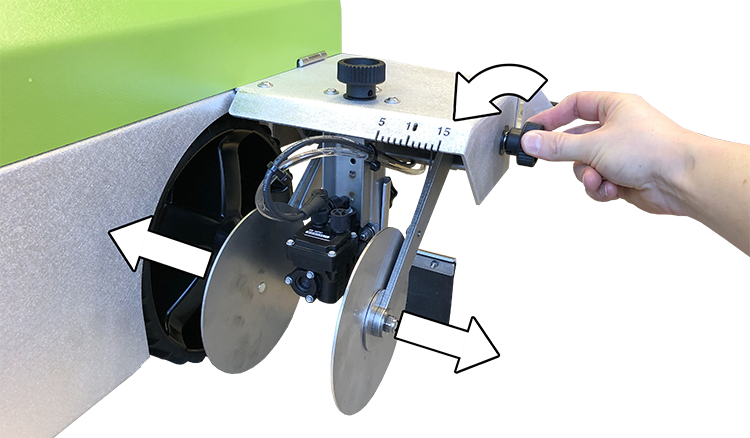
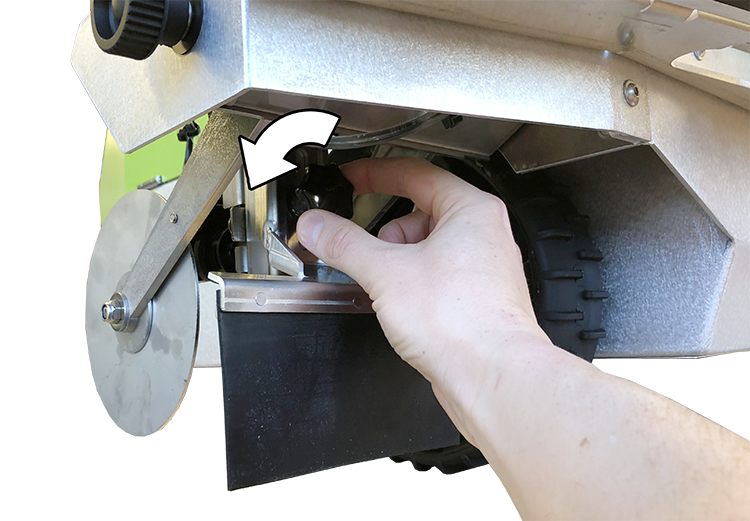
# Adjusting Distance Between Spray Discs
Increase distance between spray discs:
1. Rotate the turn knob counterclockwise to increase the distance between each Spray Disc.
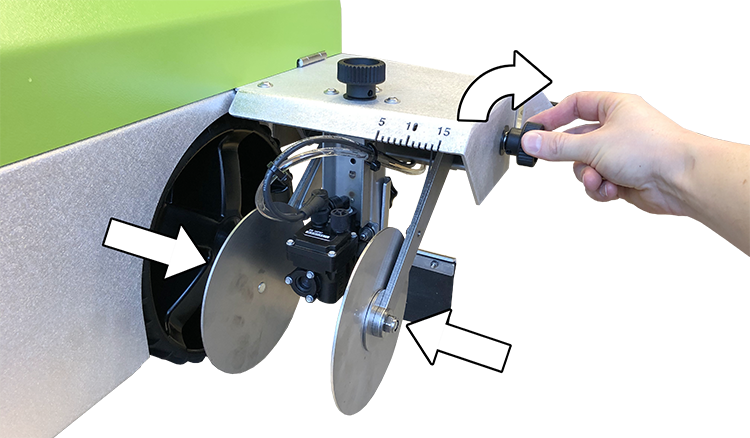
Decrease distance between spray discs:
1. Rotate the turn knob clockwise to decrease the distance between each Spray Disc.
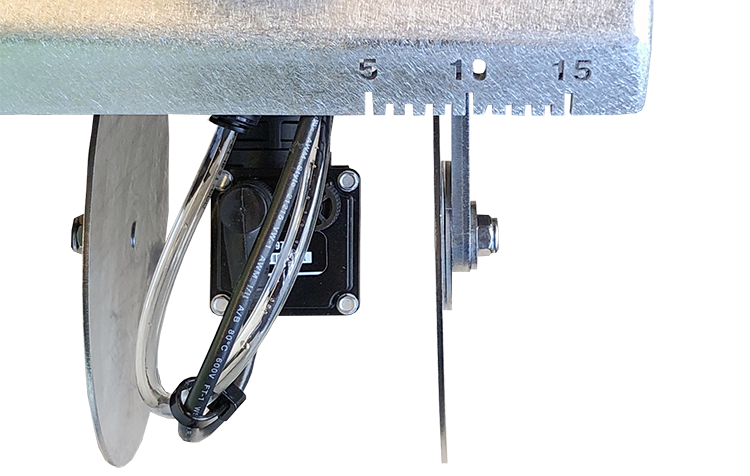
# Reading The Distance Between Spray Discs
The distance between the Spray Discs can be read on ruler above. The ruler is showing the distance in centimeters. The distance is read from above where the outside of the arm for the outer Spray Disc is used as reference. On the illustration below the distance is 10cm.
# Adjusting The Spray Guard
The purpose of the Spray Guard is to minimize the amount of paint being sprayed forward. The Spray Guard should be adjusted so it is barely touching the grass or surface being painted.
1. Rotate the turn knob counterclockwise to loosen.
2. By hand, adjust the height of the Spray Guard.
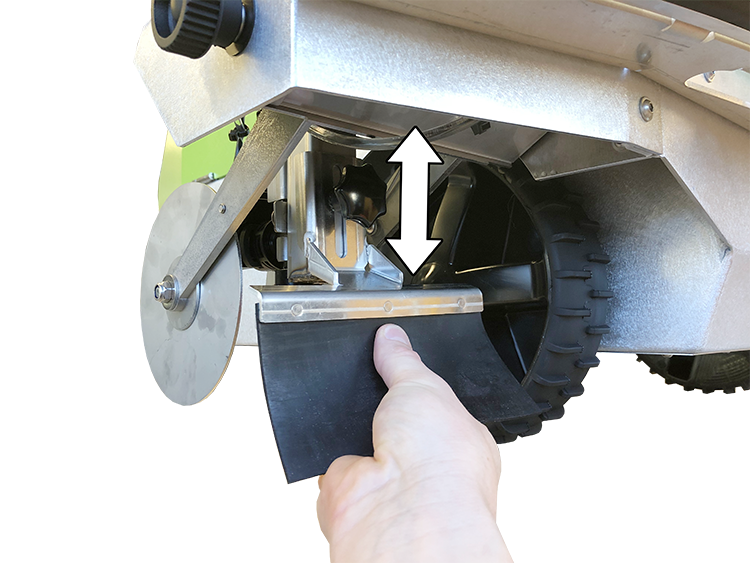
3. Rotate the turn knob clockwise to tighten.

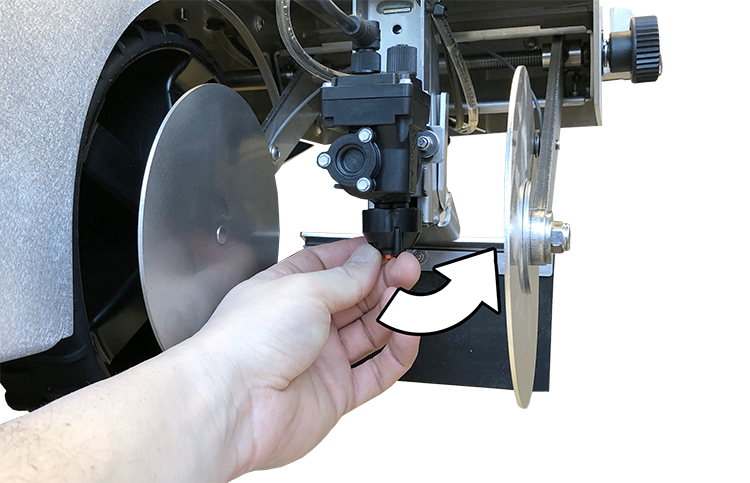
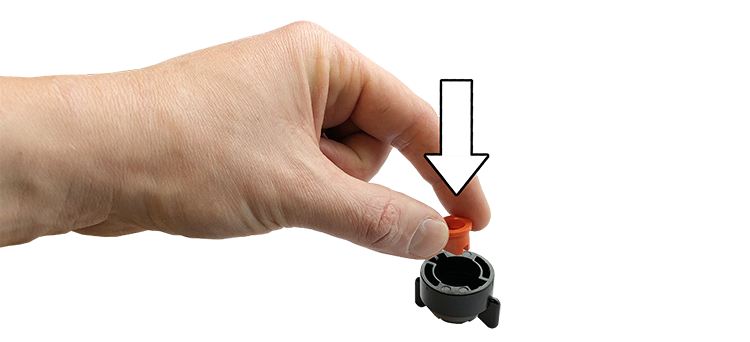
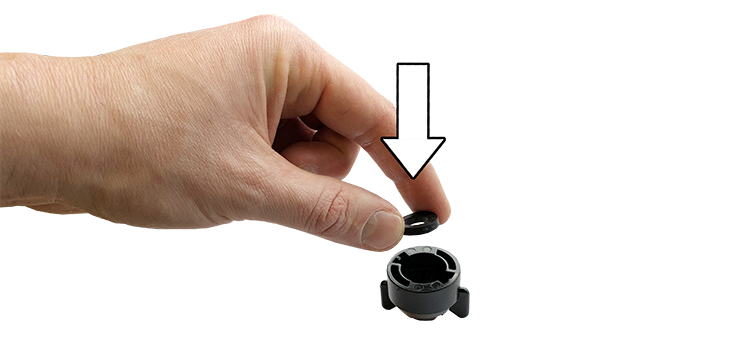
# Replacing The Nozzle
1. Rotate the nozzle house to unlock.

2. Pull down on the nozzle house.
3. Remove the nozzle and gasket by pushing the nozzle into the housing.
4. Insert new nozzle.
5. Insert gasket.
6. Mount nozzle house.
7. Rotate the nozzle house to lock.