# Step 3 - Base Station
# Placing The Base Station
For each Base Station location, special considerations must be considered as each Base Station location is unique with respect to possible obstructions (to line of sight) to the satellites (trees, buildings, walls, etc.) The following is a guideline to place the Base Station in order to obtain a precise line marking.
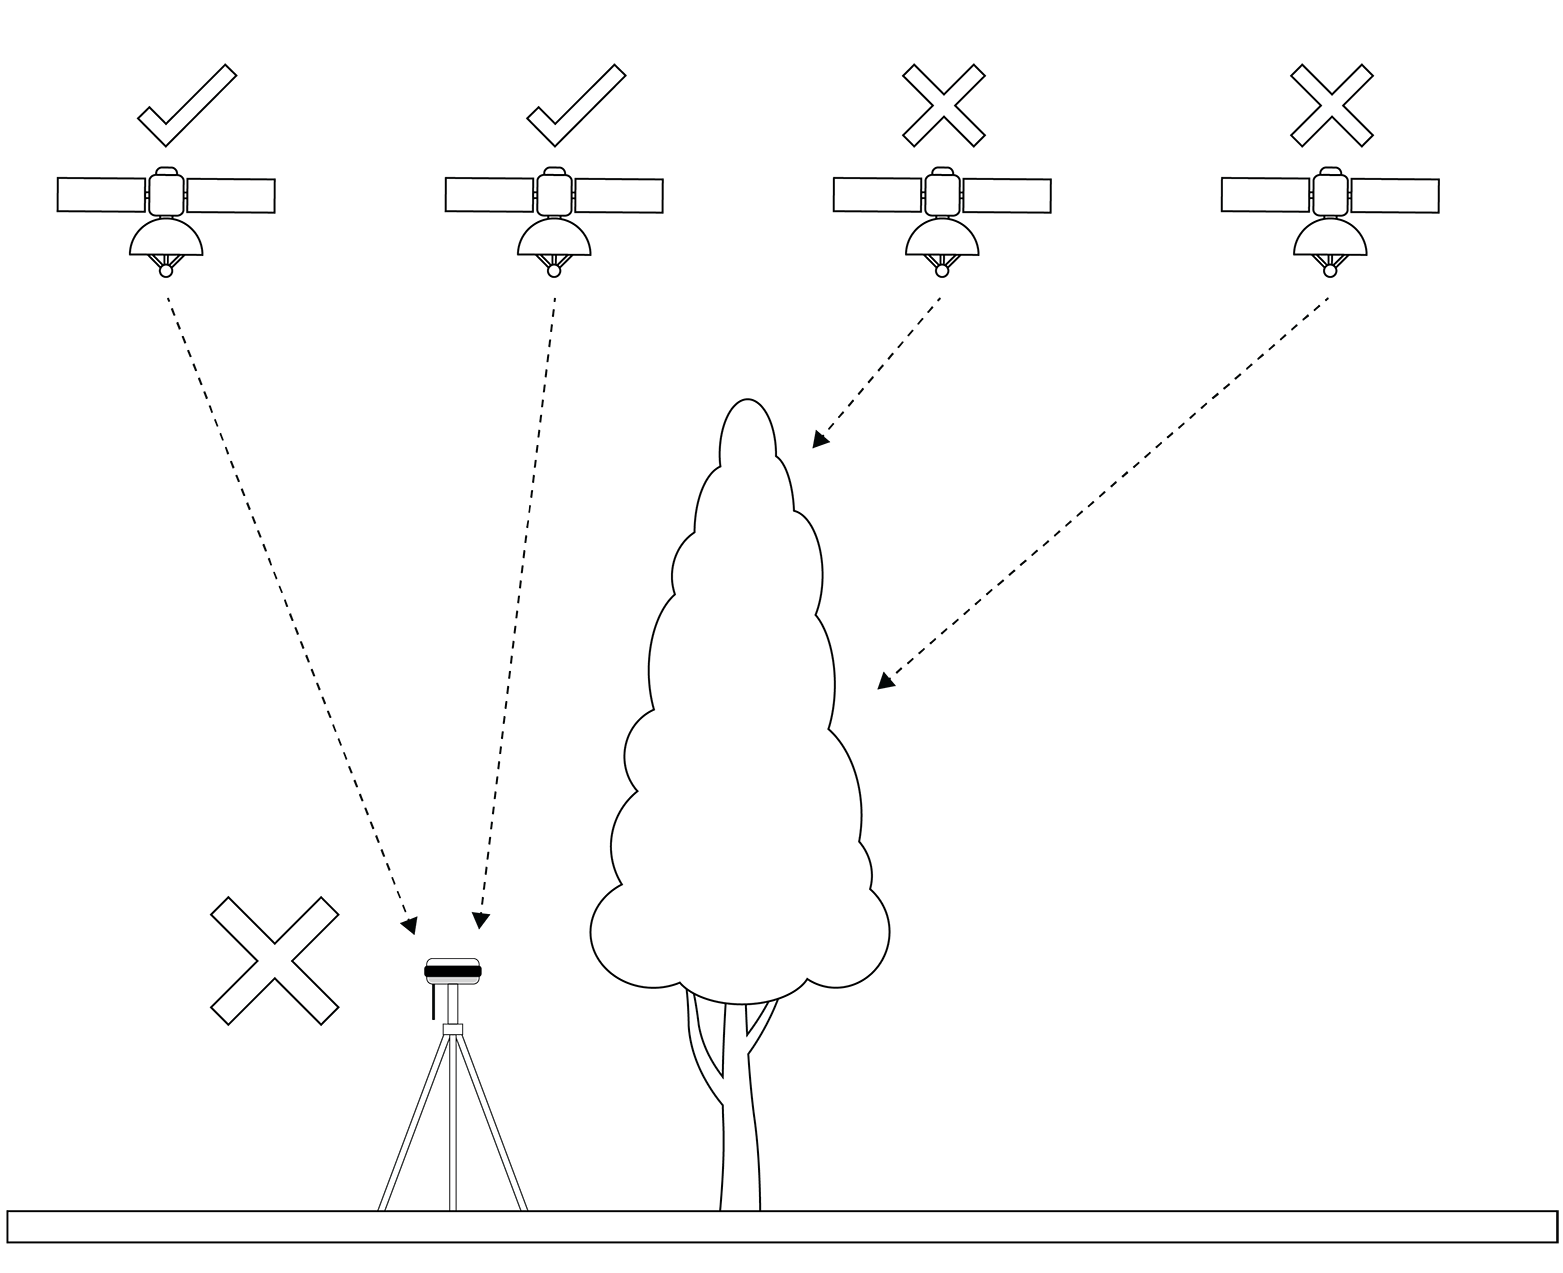
# Tall Trees
Placing the Base Station next to tall trees will cut off otherwise visible satellites. The line marking will potentially be less precise, or the Turf Tank One can stop painting all together. The further away from tall tress the Base Station can be placed the better it will be.
Good position
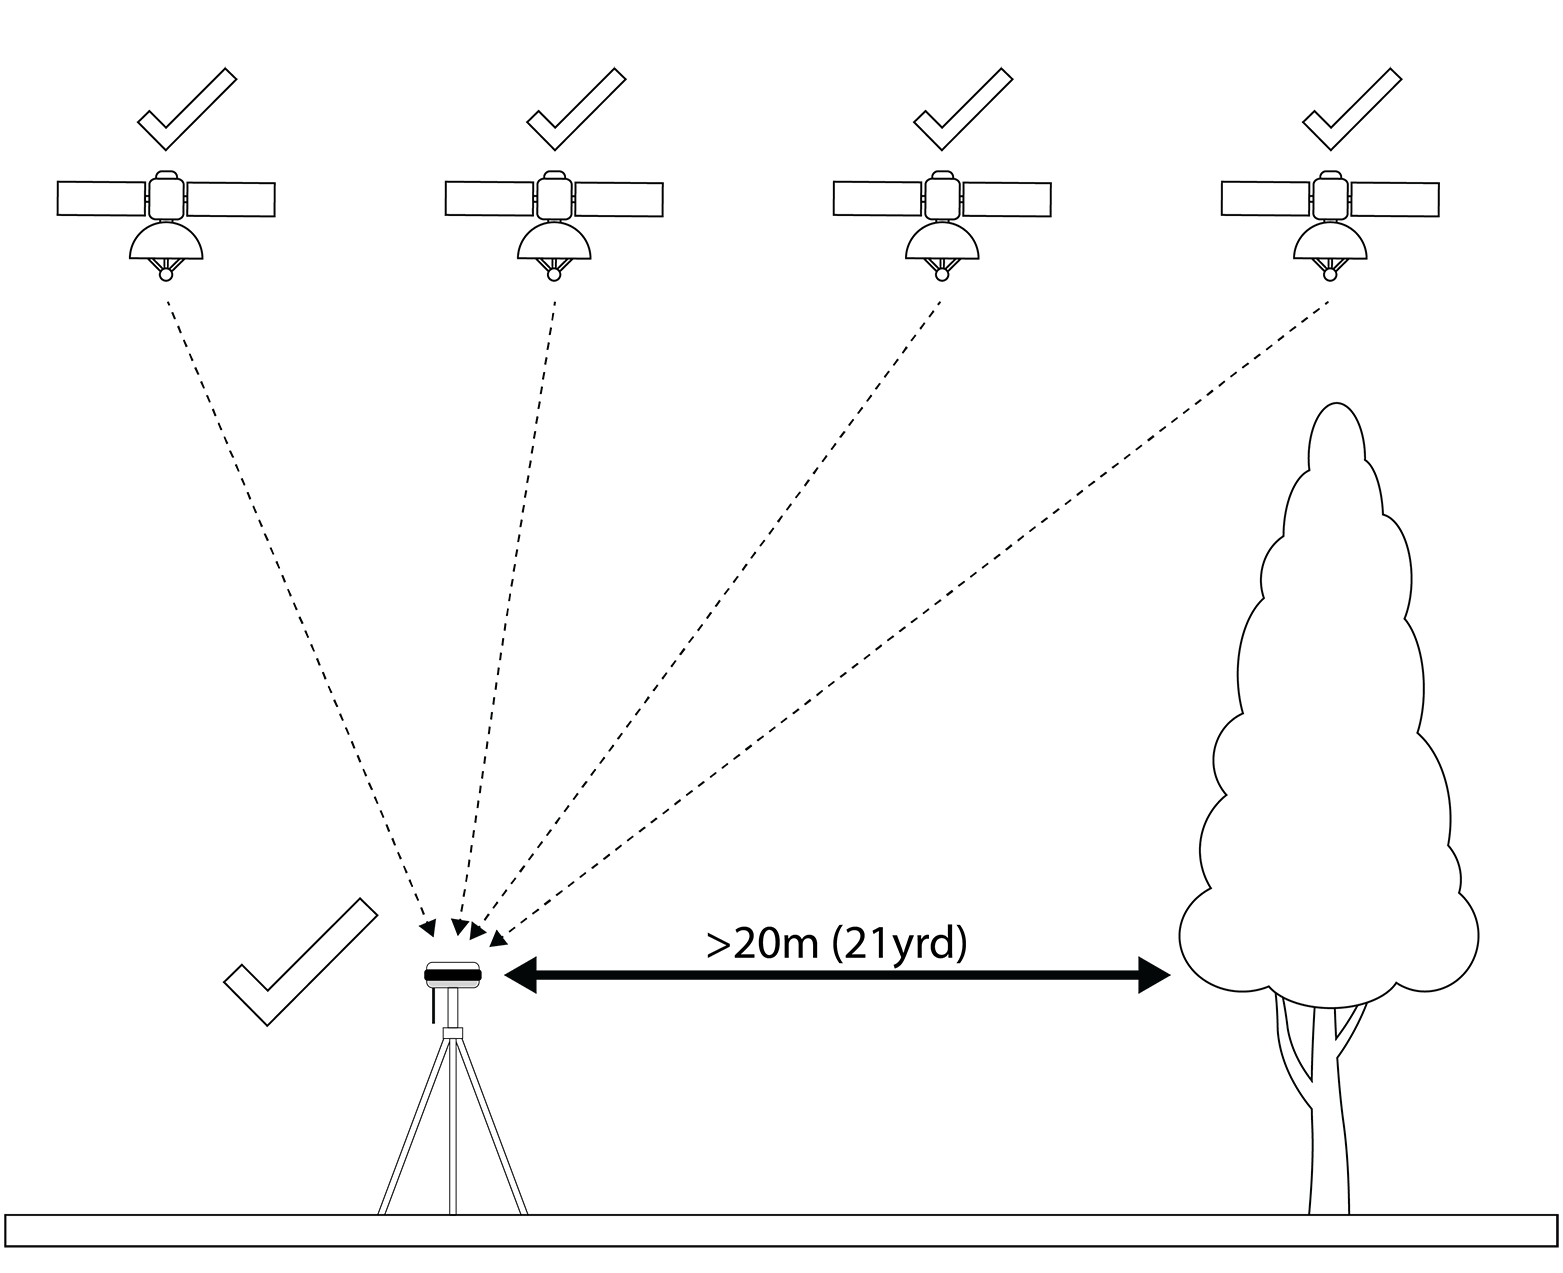
Bad position
Trees are obstructing the satellites.
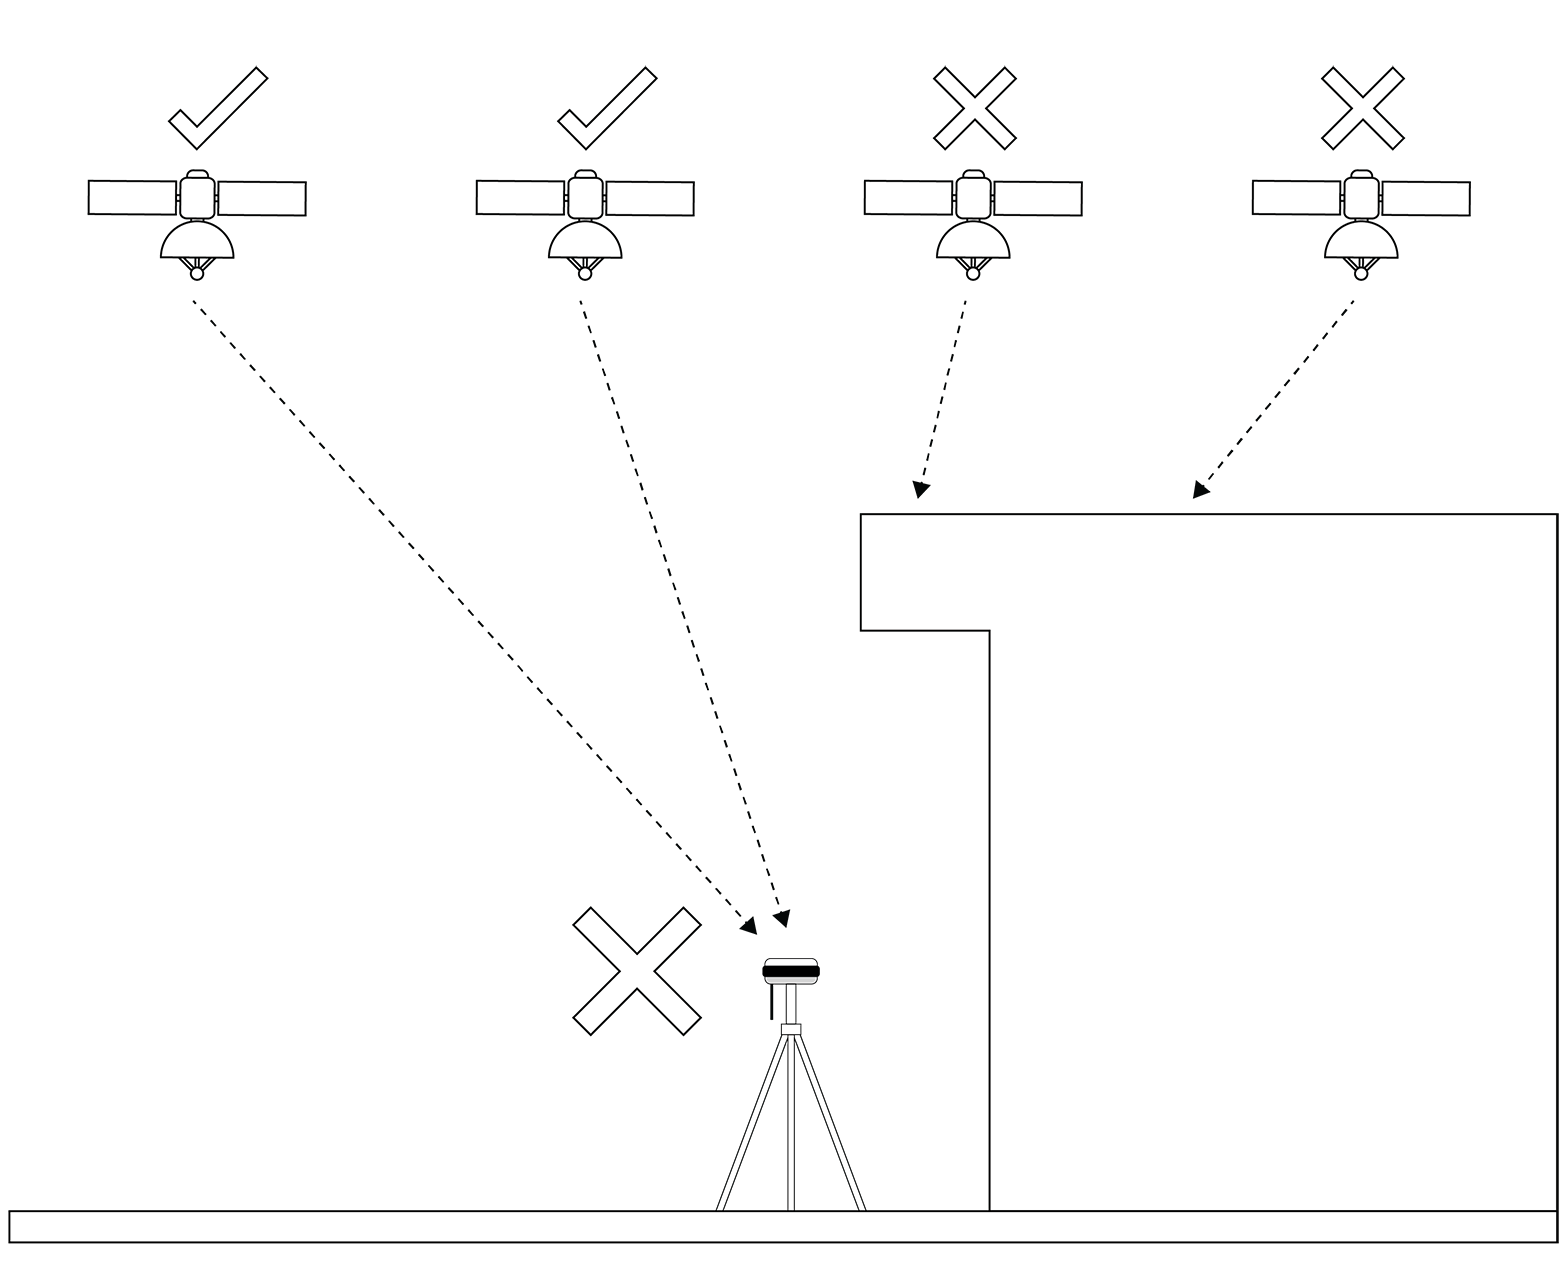
# Structures
Placing the Base Station next to buildings and fences taller than the Base Station will cut off otherwise visible satellites. The line marking will potentially be less precise, or the Turf Tank One can stop painting all together. The further away from tall buildings the Base Station can be placed the better it will be.
Good position

Bad position
In this case, the building is obstructing the satellites.
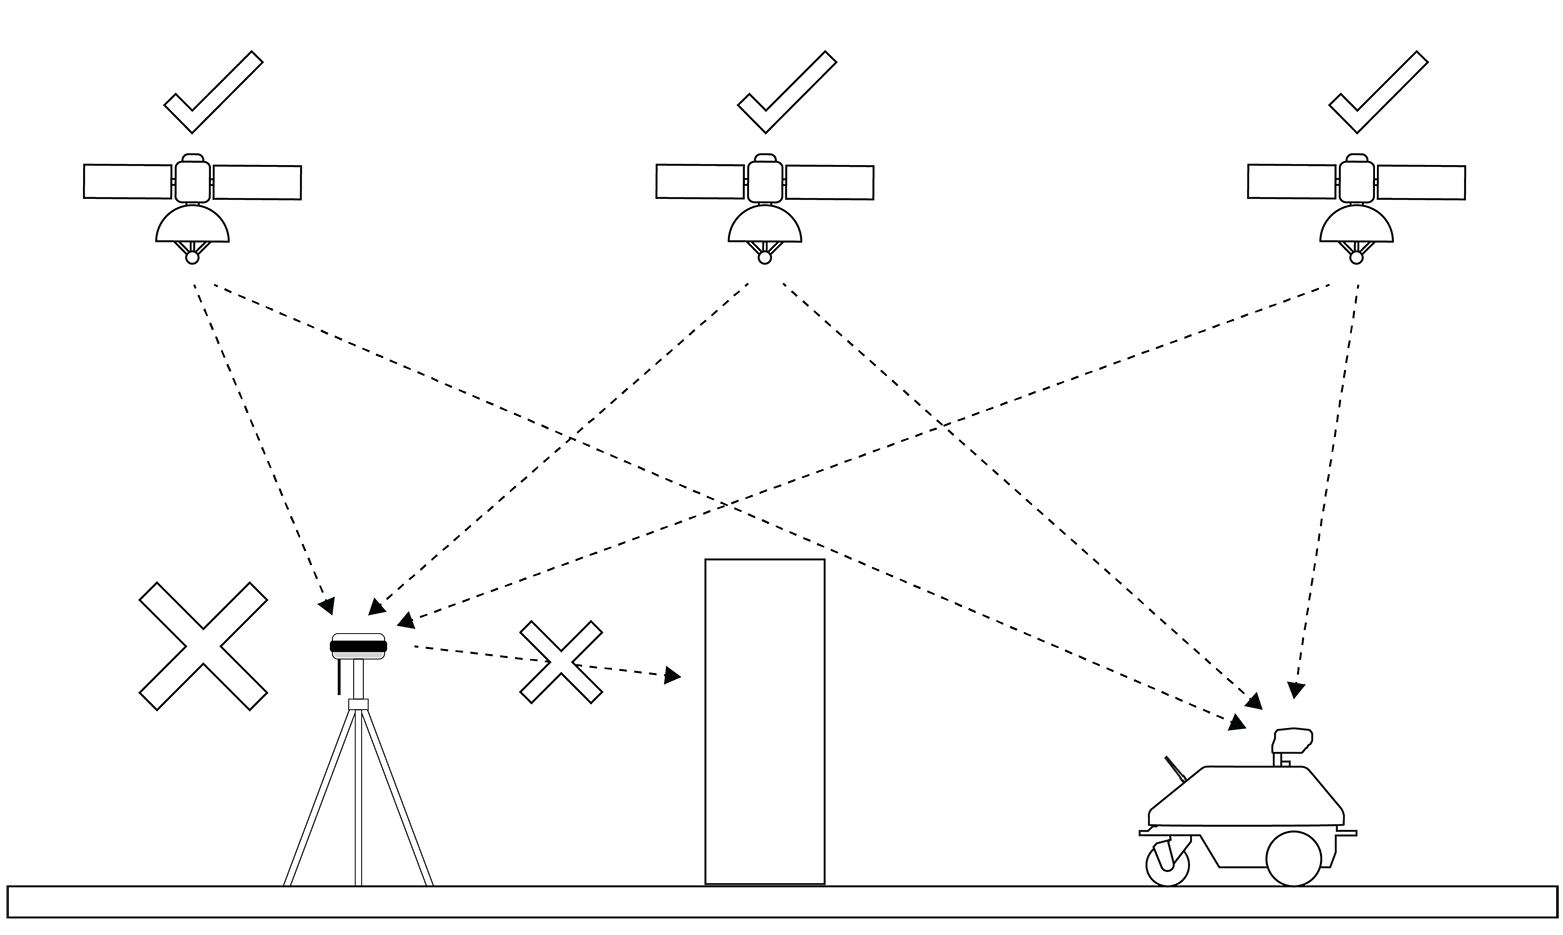
# Obstrucing Line Of Sight - Base Station To Turf Tank One
Placing the Base Station such that it cannot directly “see” the Turf Tank One must be avoided since the Turf Tank One's precision is increased by the position correction data sent from the Base Station. Obstructing objects can be buildings, fences, trees, etc.
Good position
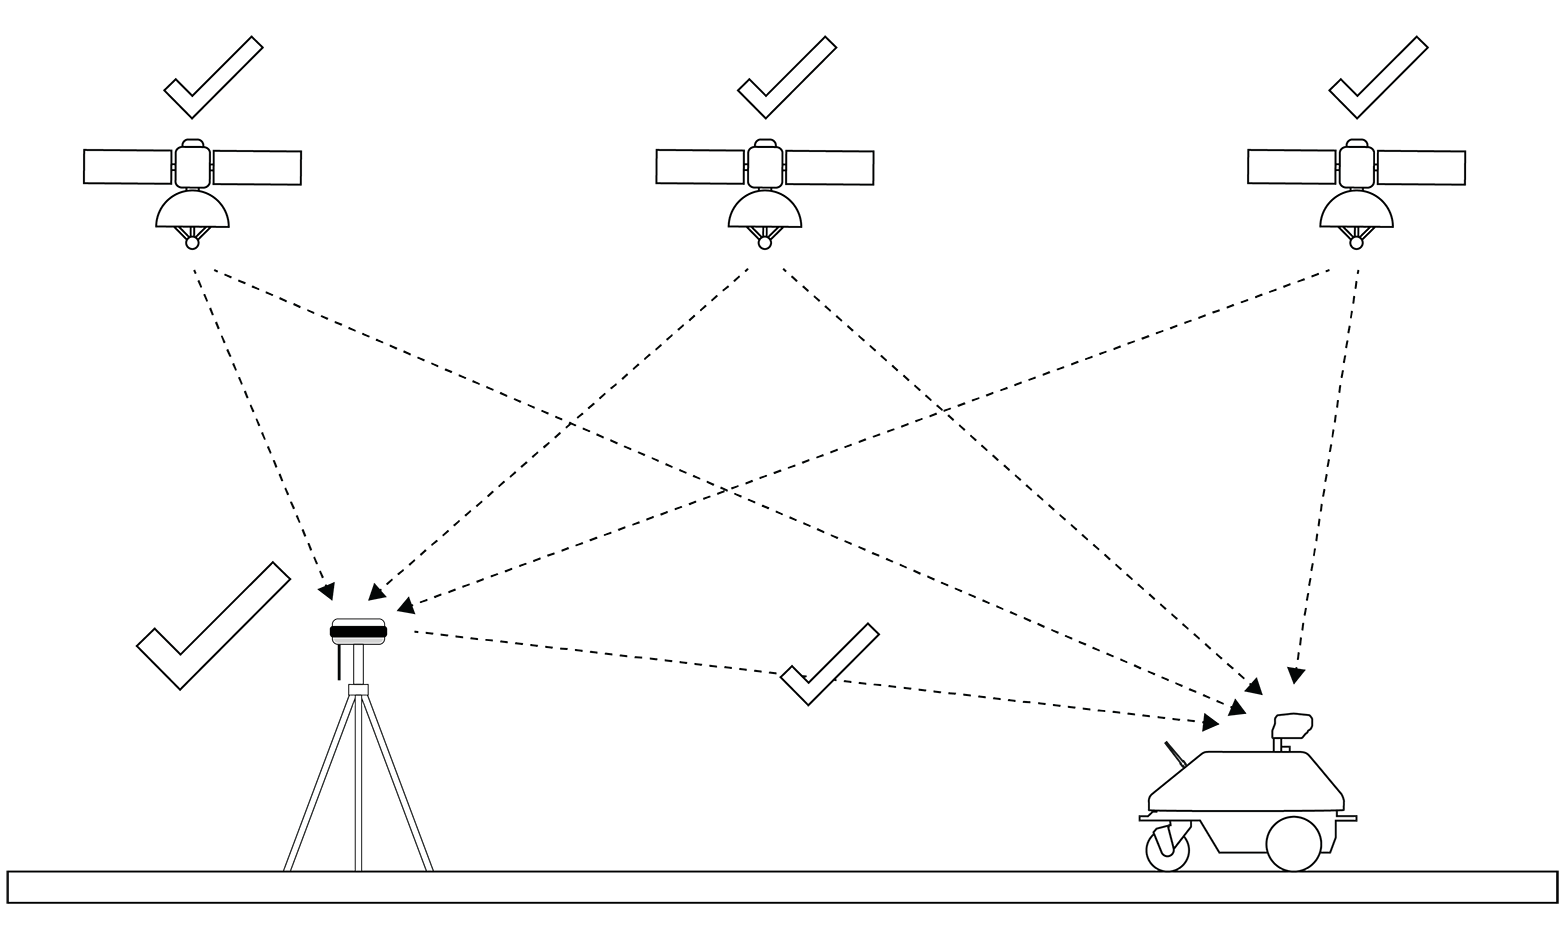
Bad position
In this case, the an object is obstructing the satellites.
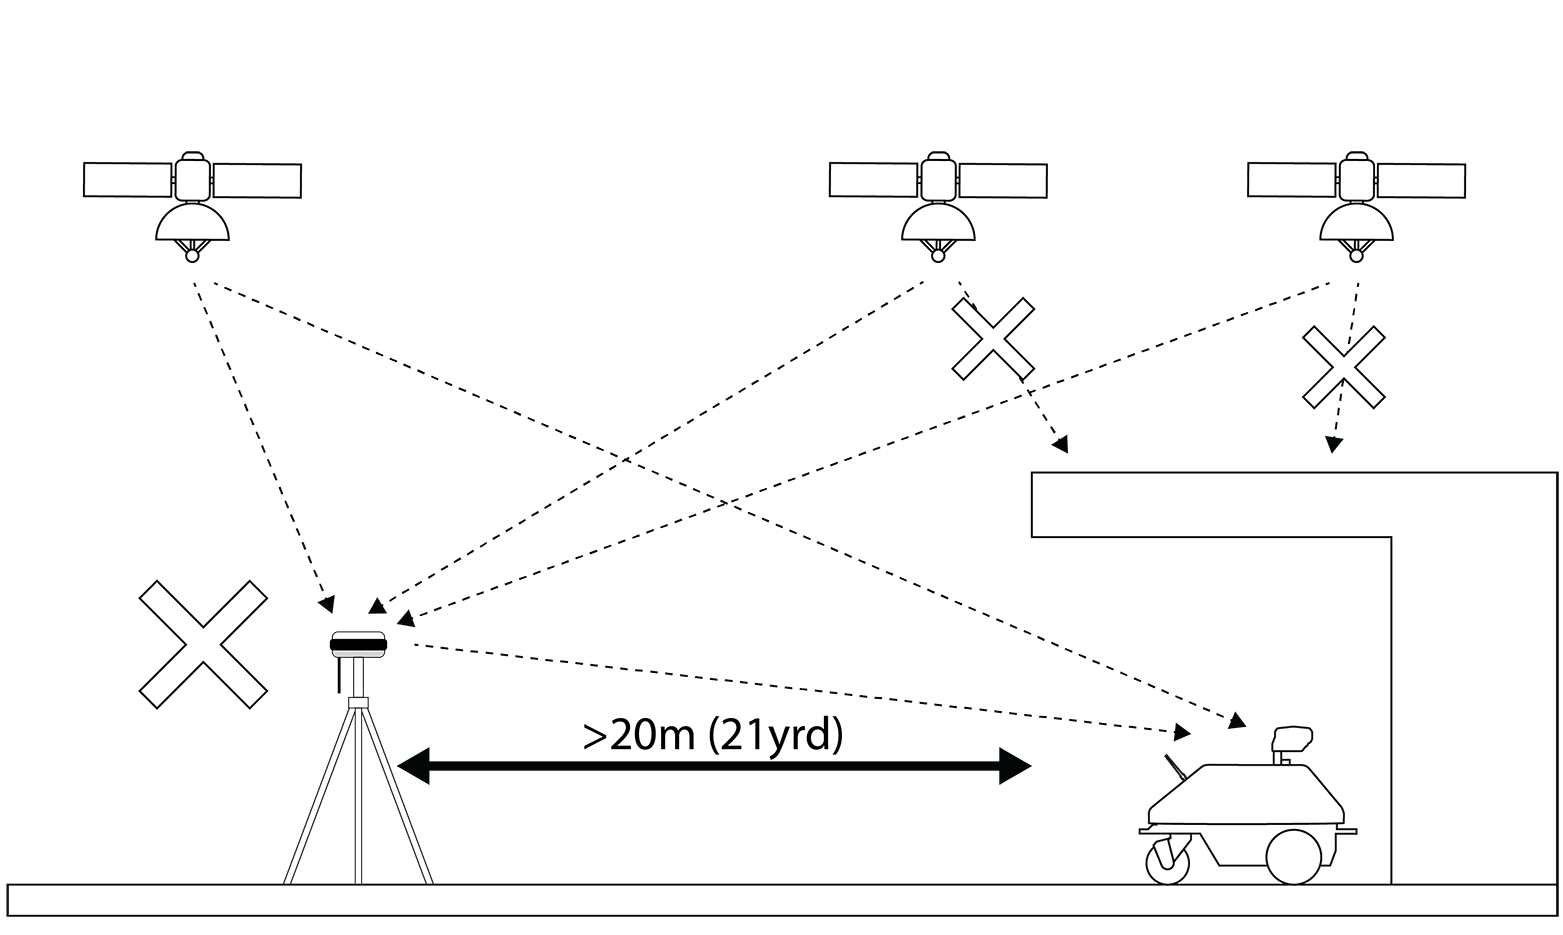
# Obstrucing Line Of Sight - Turf Tank One To Satellites
Both the Base Station and Turf Tank One needs a connection to the satellites. It is not possible for the Turf Tank One to paint if it cannot connect to the satellites. Even if the Turf Tank One has “line of sight” with the Base Station. The “overhanging” structure can also be trees which prevents the Turf Tank One from connection to the satellites. This also means that indoor painting is not possible even with the Base Station placed outdoors.
Bad position
The Turf Tank One cannot "see" the satellites.
# Sloped Surfaces
Placing the Base Station on a sloped surface will potentially cut off otherwise visible satellites, and line marking can be less precise. If a sloped surface can´t be avoided it is highly important to use the leveling bubble to ensure a level position. If a sloped surface cannot be avoided, the telescopic legs of the tripod must be used to compensate for the incline to keep a level position for the Base Station
Good position
Base Station is placed on a flat surface.

Good position
Base Station is level despite being placed on a sloped surface.

Bad position
The Base Station is not level.

# Placing At field
When marking a field it is important to place the Base Station in such a way that the Turf Tank One will not hit the Base Station while operating. Additionally, moving the Base Station during operation it not permitted. This will offset the line which the Turf Tank One is currently painting.
If placing the Base Station on the field, the operator needs to be certain about where the painted field will be. This also includes the transit lines (non-painted lines or routes which the Turf Tank One follows when moving from one painted line to another). Below is an example with a soccer field where the Base Station is placed on field. Transit lines are shown as green (not all transit lines are shown). Both painted lines and transit lines does not interfere with the Base Station. It can also be an advantage to place the Base Station on field, especially if marking a stadium or a field surrounded by trees.

Another option is to place the Base Station next to the field (rather than on the field).
Shown below is a guideline regarding how close the Base Station is placed to a field where the minimum distance is 200cm (6 1/2ft).
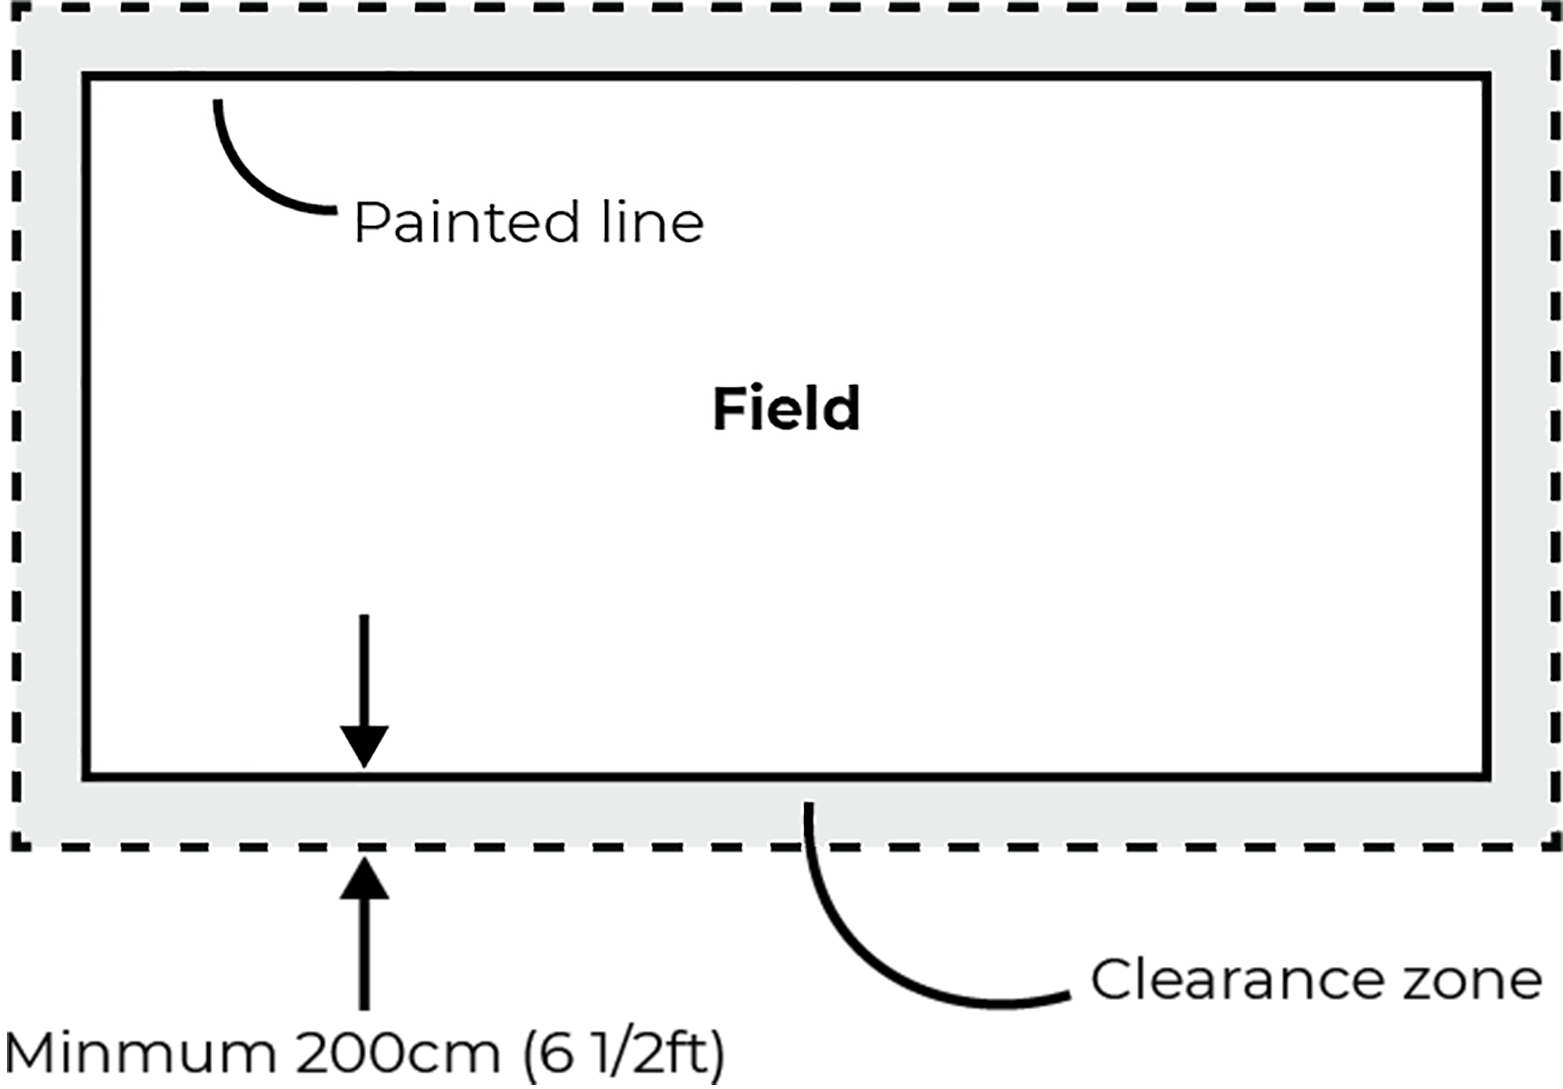
Please note
If placing the Base Station next to the field it is important to still ensure that the guidelines regarding trees, structures, line of sight and sloping surfaces are kept.
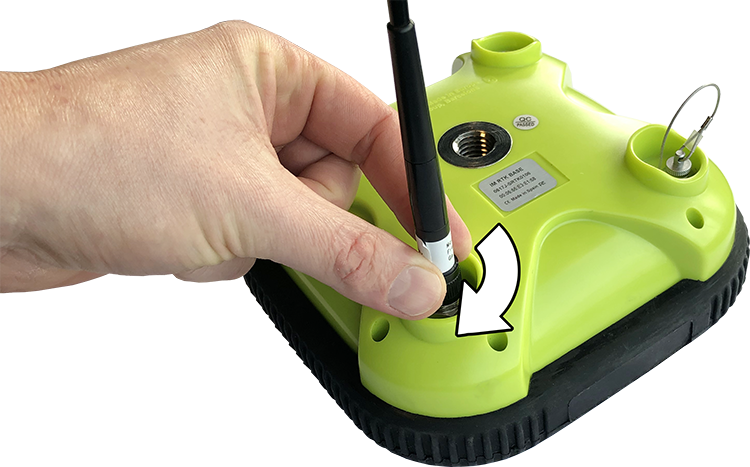
# Mount The Antenna
1. With a clockwise rotation, mount the antenna (29cm) onto the Antenna Connector.
# Set up the Prism Pole With Prism Pole Tripod
# Extending The Legs
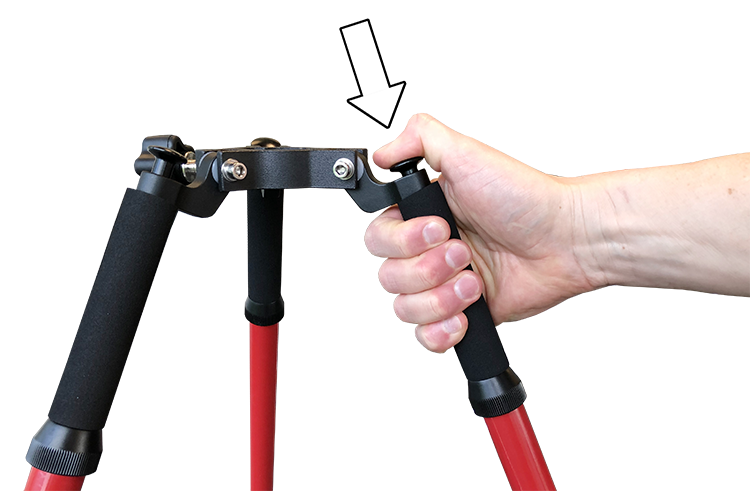
1. Hold down on the press-release lock.
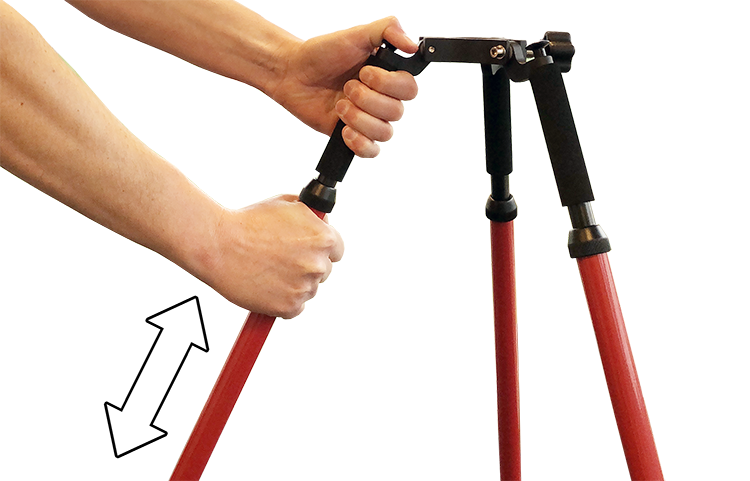
2. Pull the leg to the desired length.
3. Release the press-release lock.

# Adjusting the leg angle
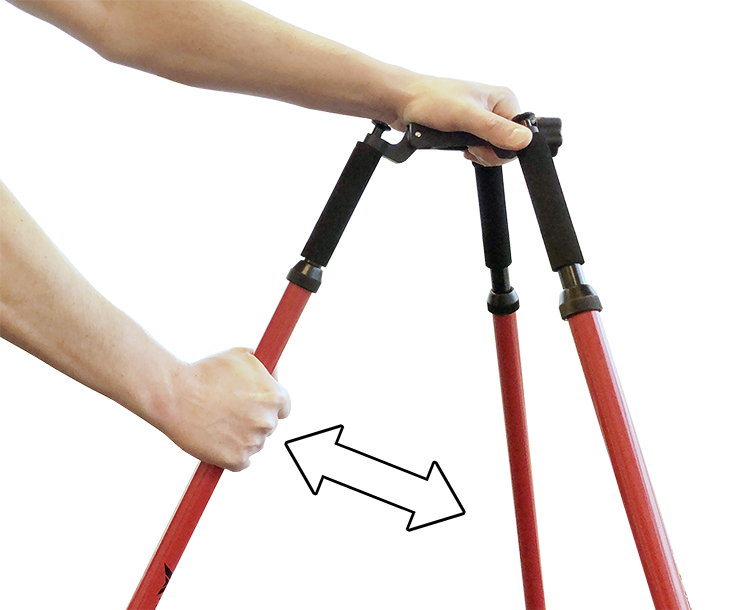
1. Pull out each leg to approx. 45 degrees.
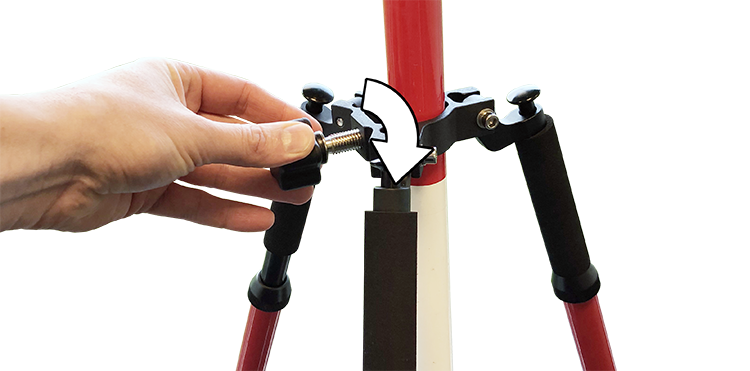
# Mount Prism Pole on Prism Pole Tripod
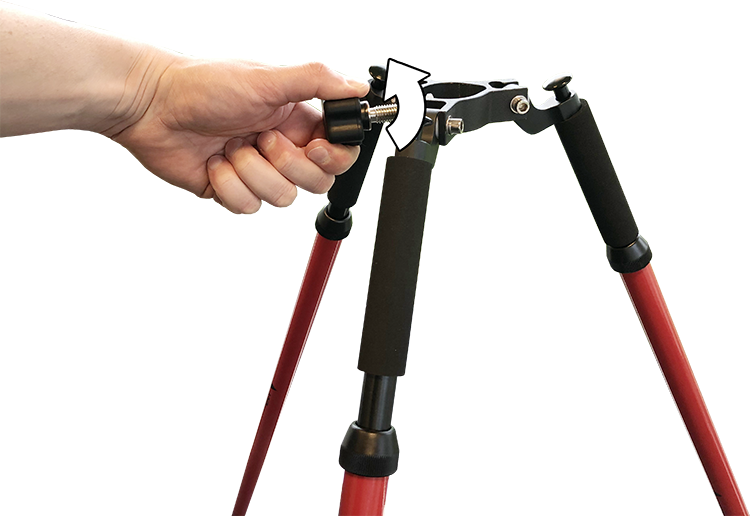
1. Loosen the screw lock with a counterclockwise rotation.
2. From the top, slide the Prism Pole down through the collar.
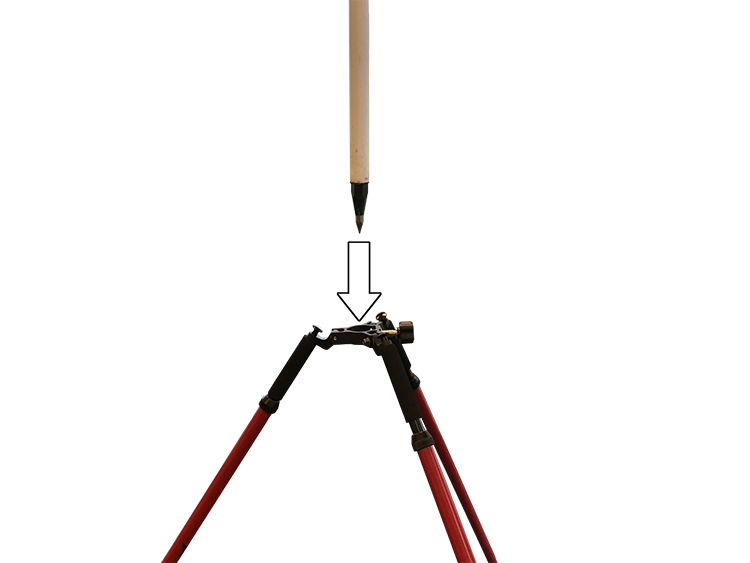
3. Insert Prism Pole into a pipe (or above the marked position).
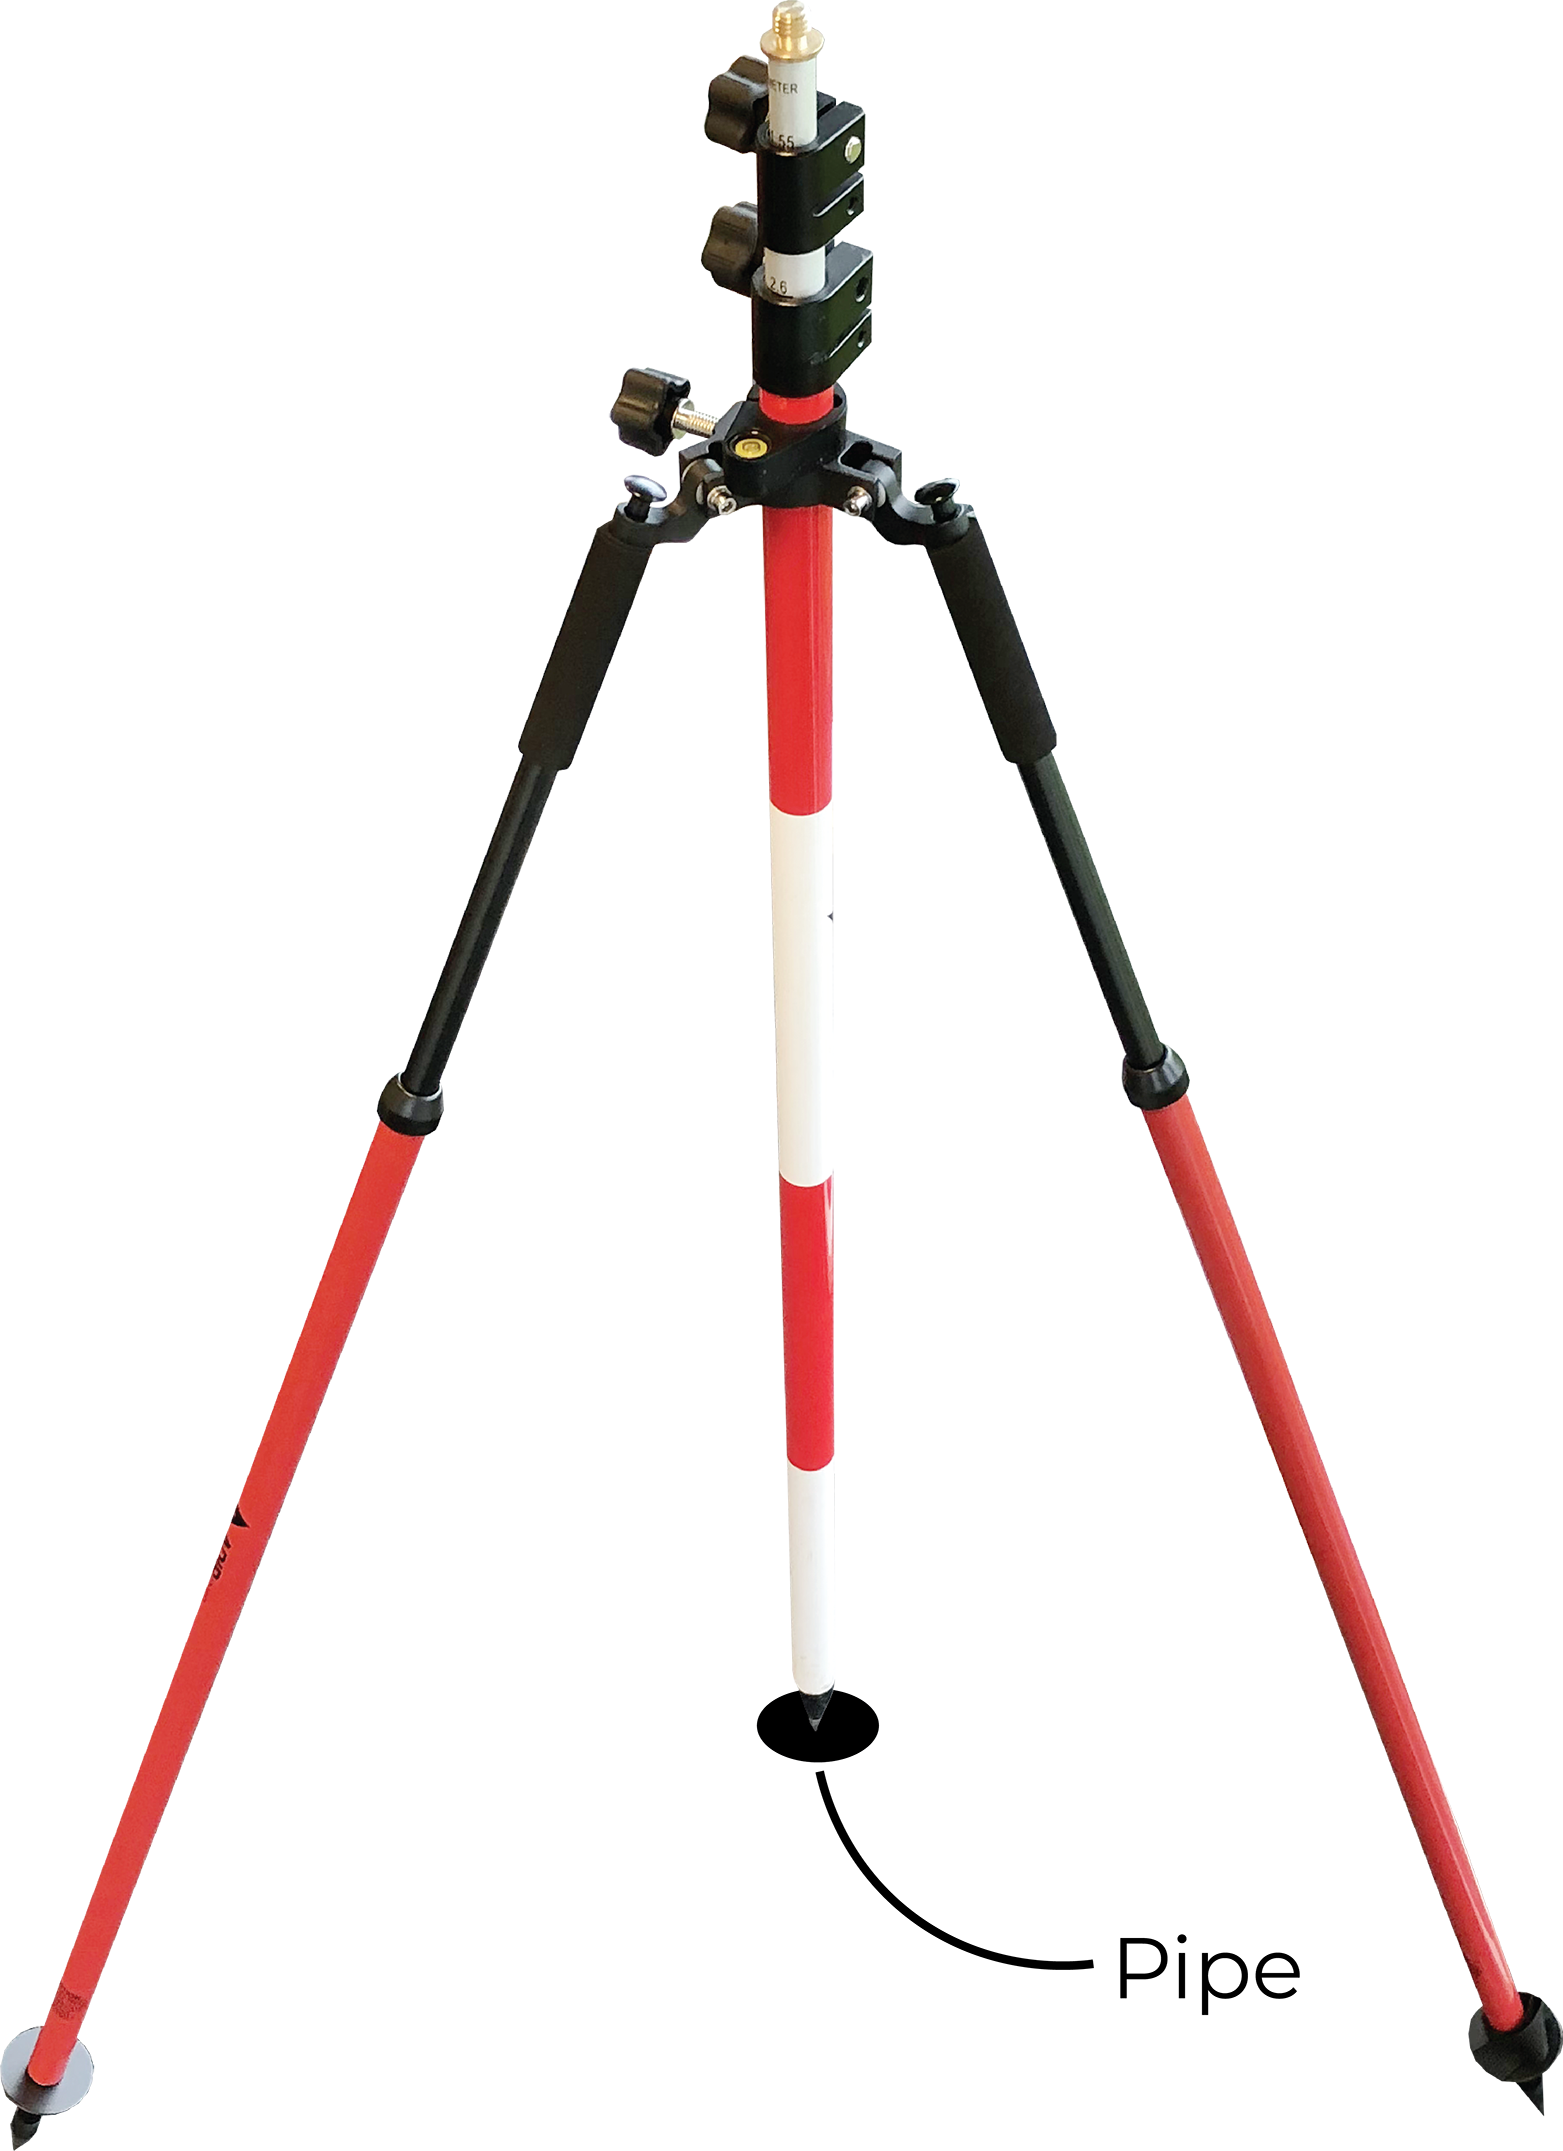
4. Tighten the screw lock with a clockwise rotation to lock the Prism Pole.
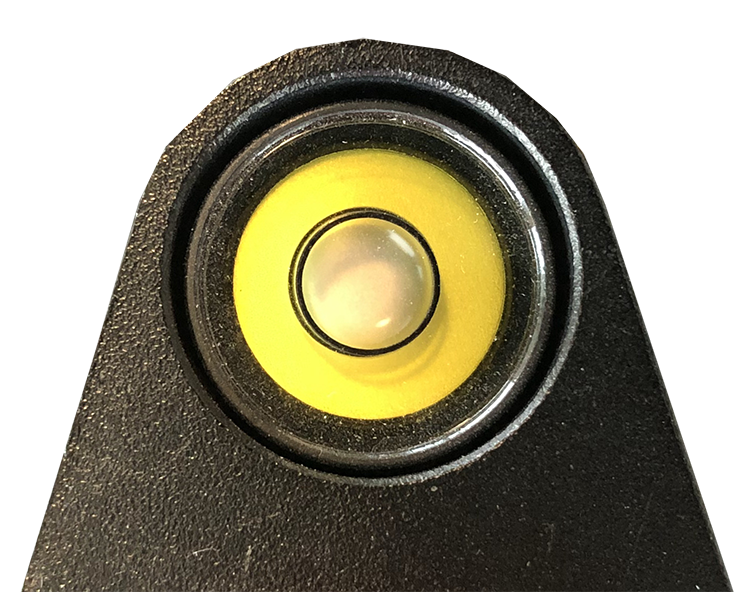
5. Extend or retract each leg until the leveling bubble is centred within the circle. The leveling bubble is found on the Prism Pole.
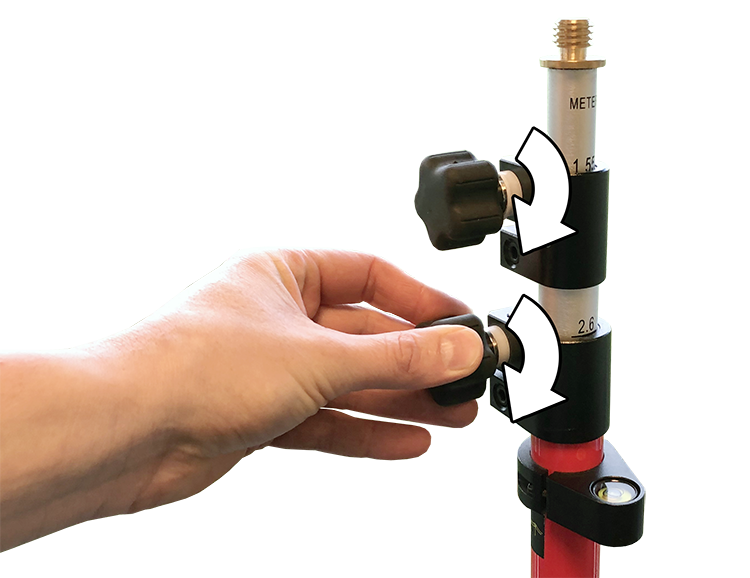
# Adjusting Column Height Stage 1
Please Note
- When adjusting the height it is advisable to keep a height so that the Base Station can still be reached by hand while still being above head-height.
1. Loosen the centre column's top screw lock with a clockwise rotation.
2. Pull up to extend the column.
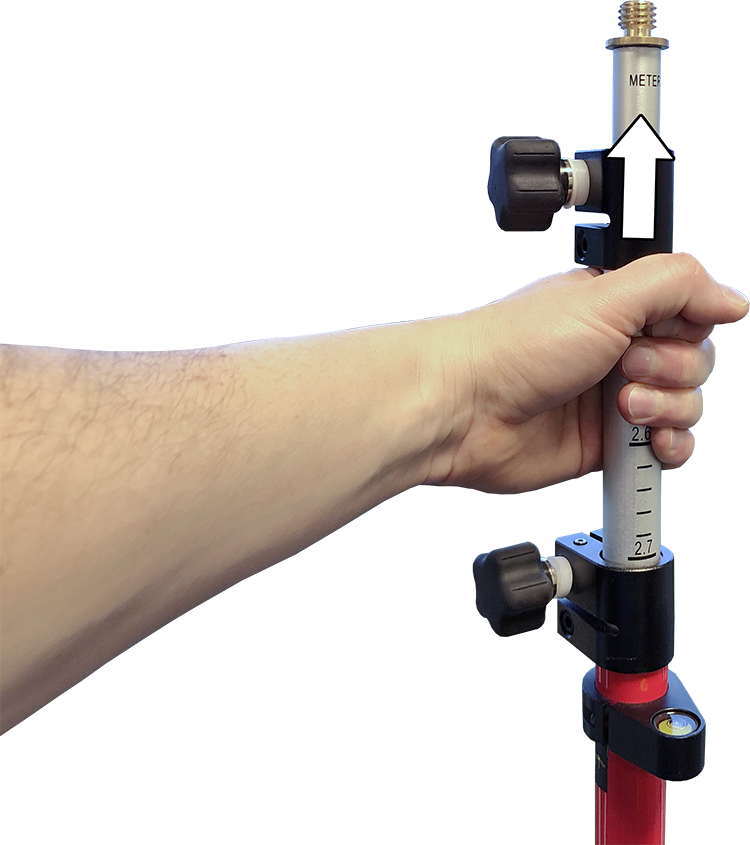
3. Lock the centre column by tigthening the screw lock with a counterclockwise rotation.
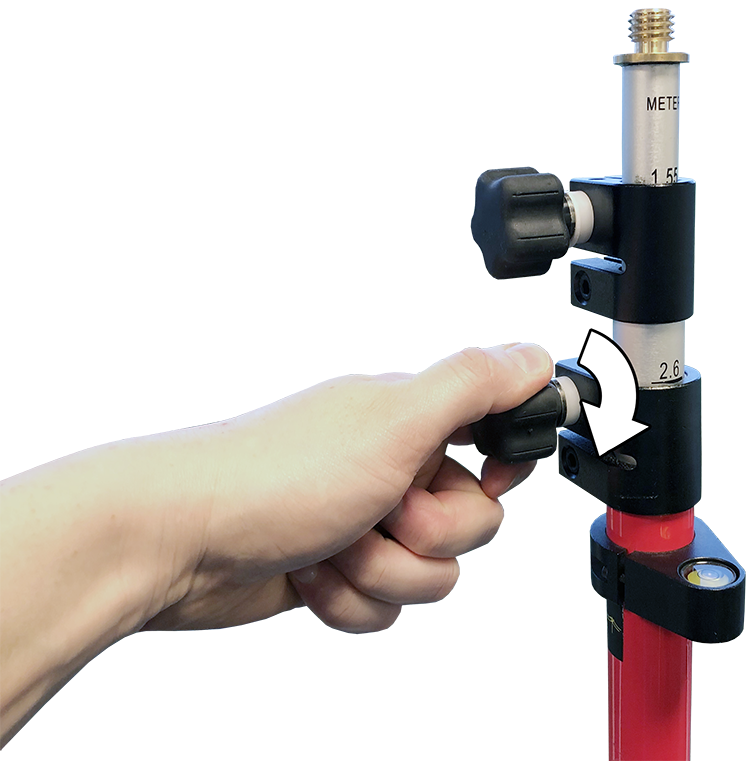
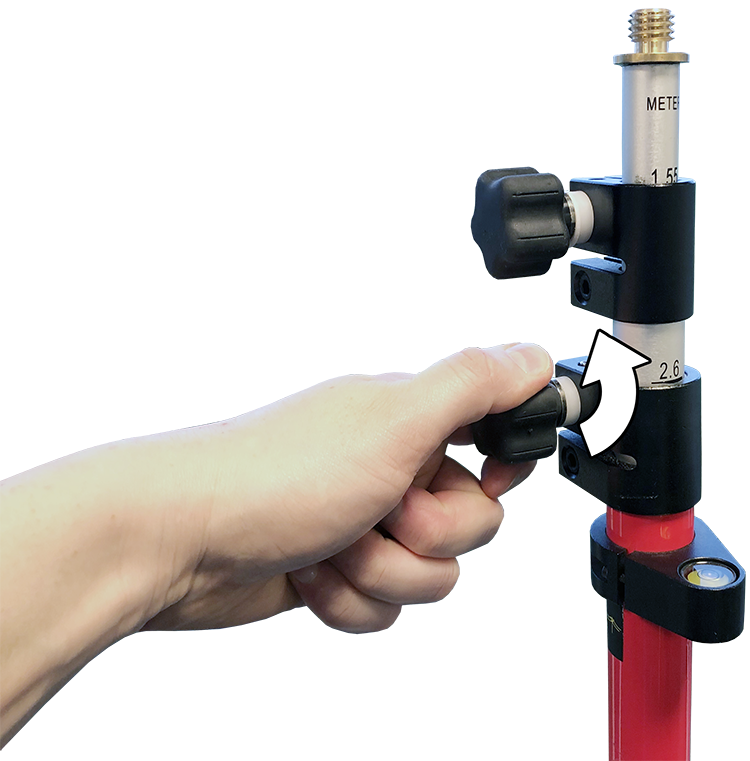
# Adjusting Column Height Stage 2
Please Note
- When adjusting the height it is advisable to keep a height so that the Base Station can still be reached by hand while still being above head-height.
1. Loosen the centre column's top screw lock with a counterclockwise rotation.

2. Pull up to extend the column.

3. Tighten the screw lock with a clockwise rotation to lock.
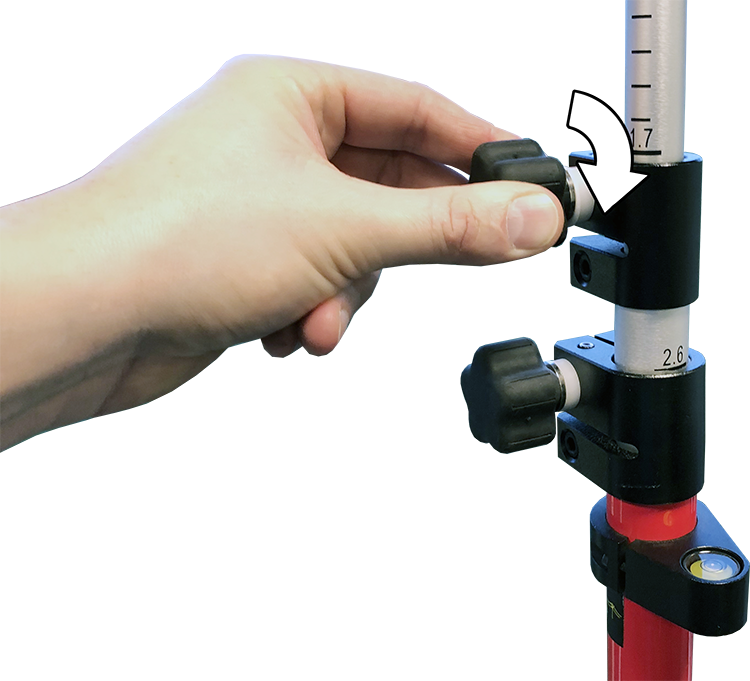
# Mount The Base Station On Prism Pole
Please note
- It is advised that the Base Station it not mounted on the Prism Pole until the Prism Pole have been installed in a pipe or otherwise secured, i.e. by using the Prism Pole Tripod.
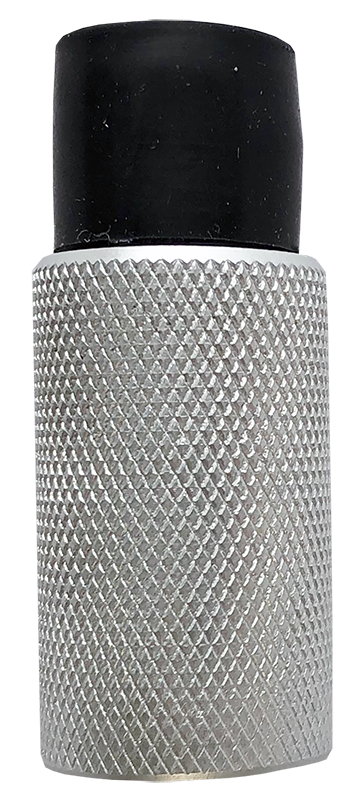
- Prior to mounting the Base Station, remove the thread adapter from the Prism Pole top. The thread adapter is not needed for mounting the Base Station.
Thread adapter is shown below.
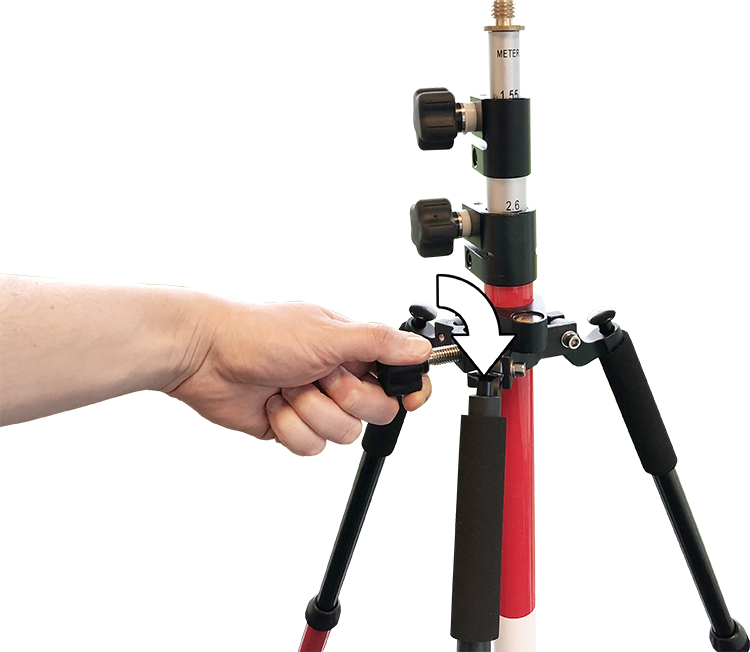
1. Tighten the screw lock with a clockwise rotation to secure the Prism Pole.
2. Tighten the bottom and top collar lock with a clockwise rotation.
3. Place the Base Station onto the 5/8” thread of the Prism Pole
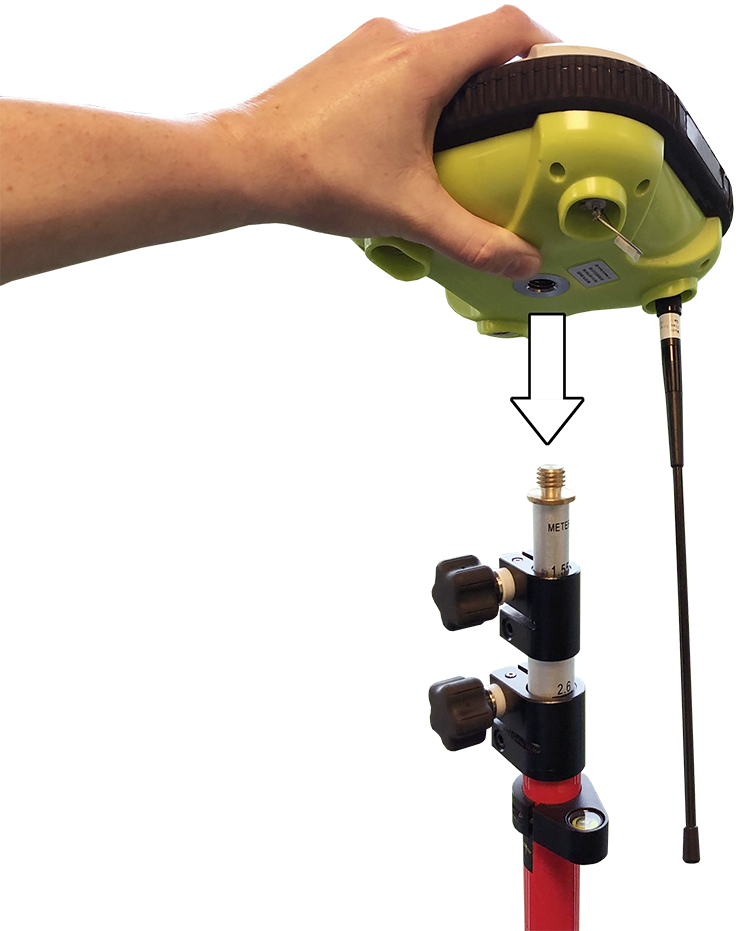
4. Rotate the Base Station clockwise to screw on.

# Turn ON Base Station
1. From OFF, press-hold on the push button.
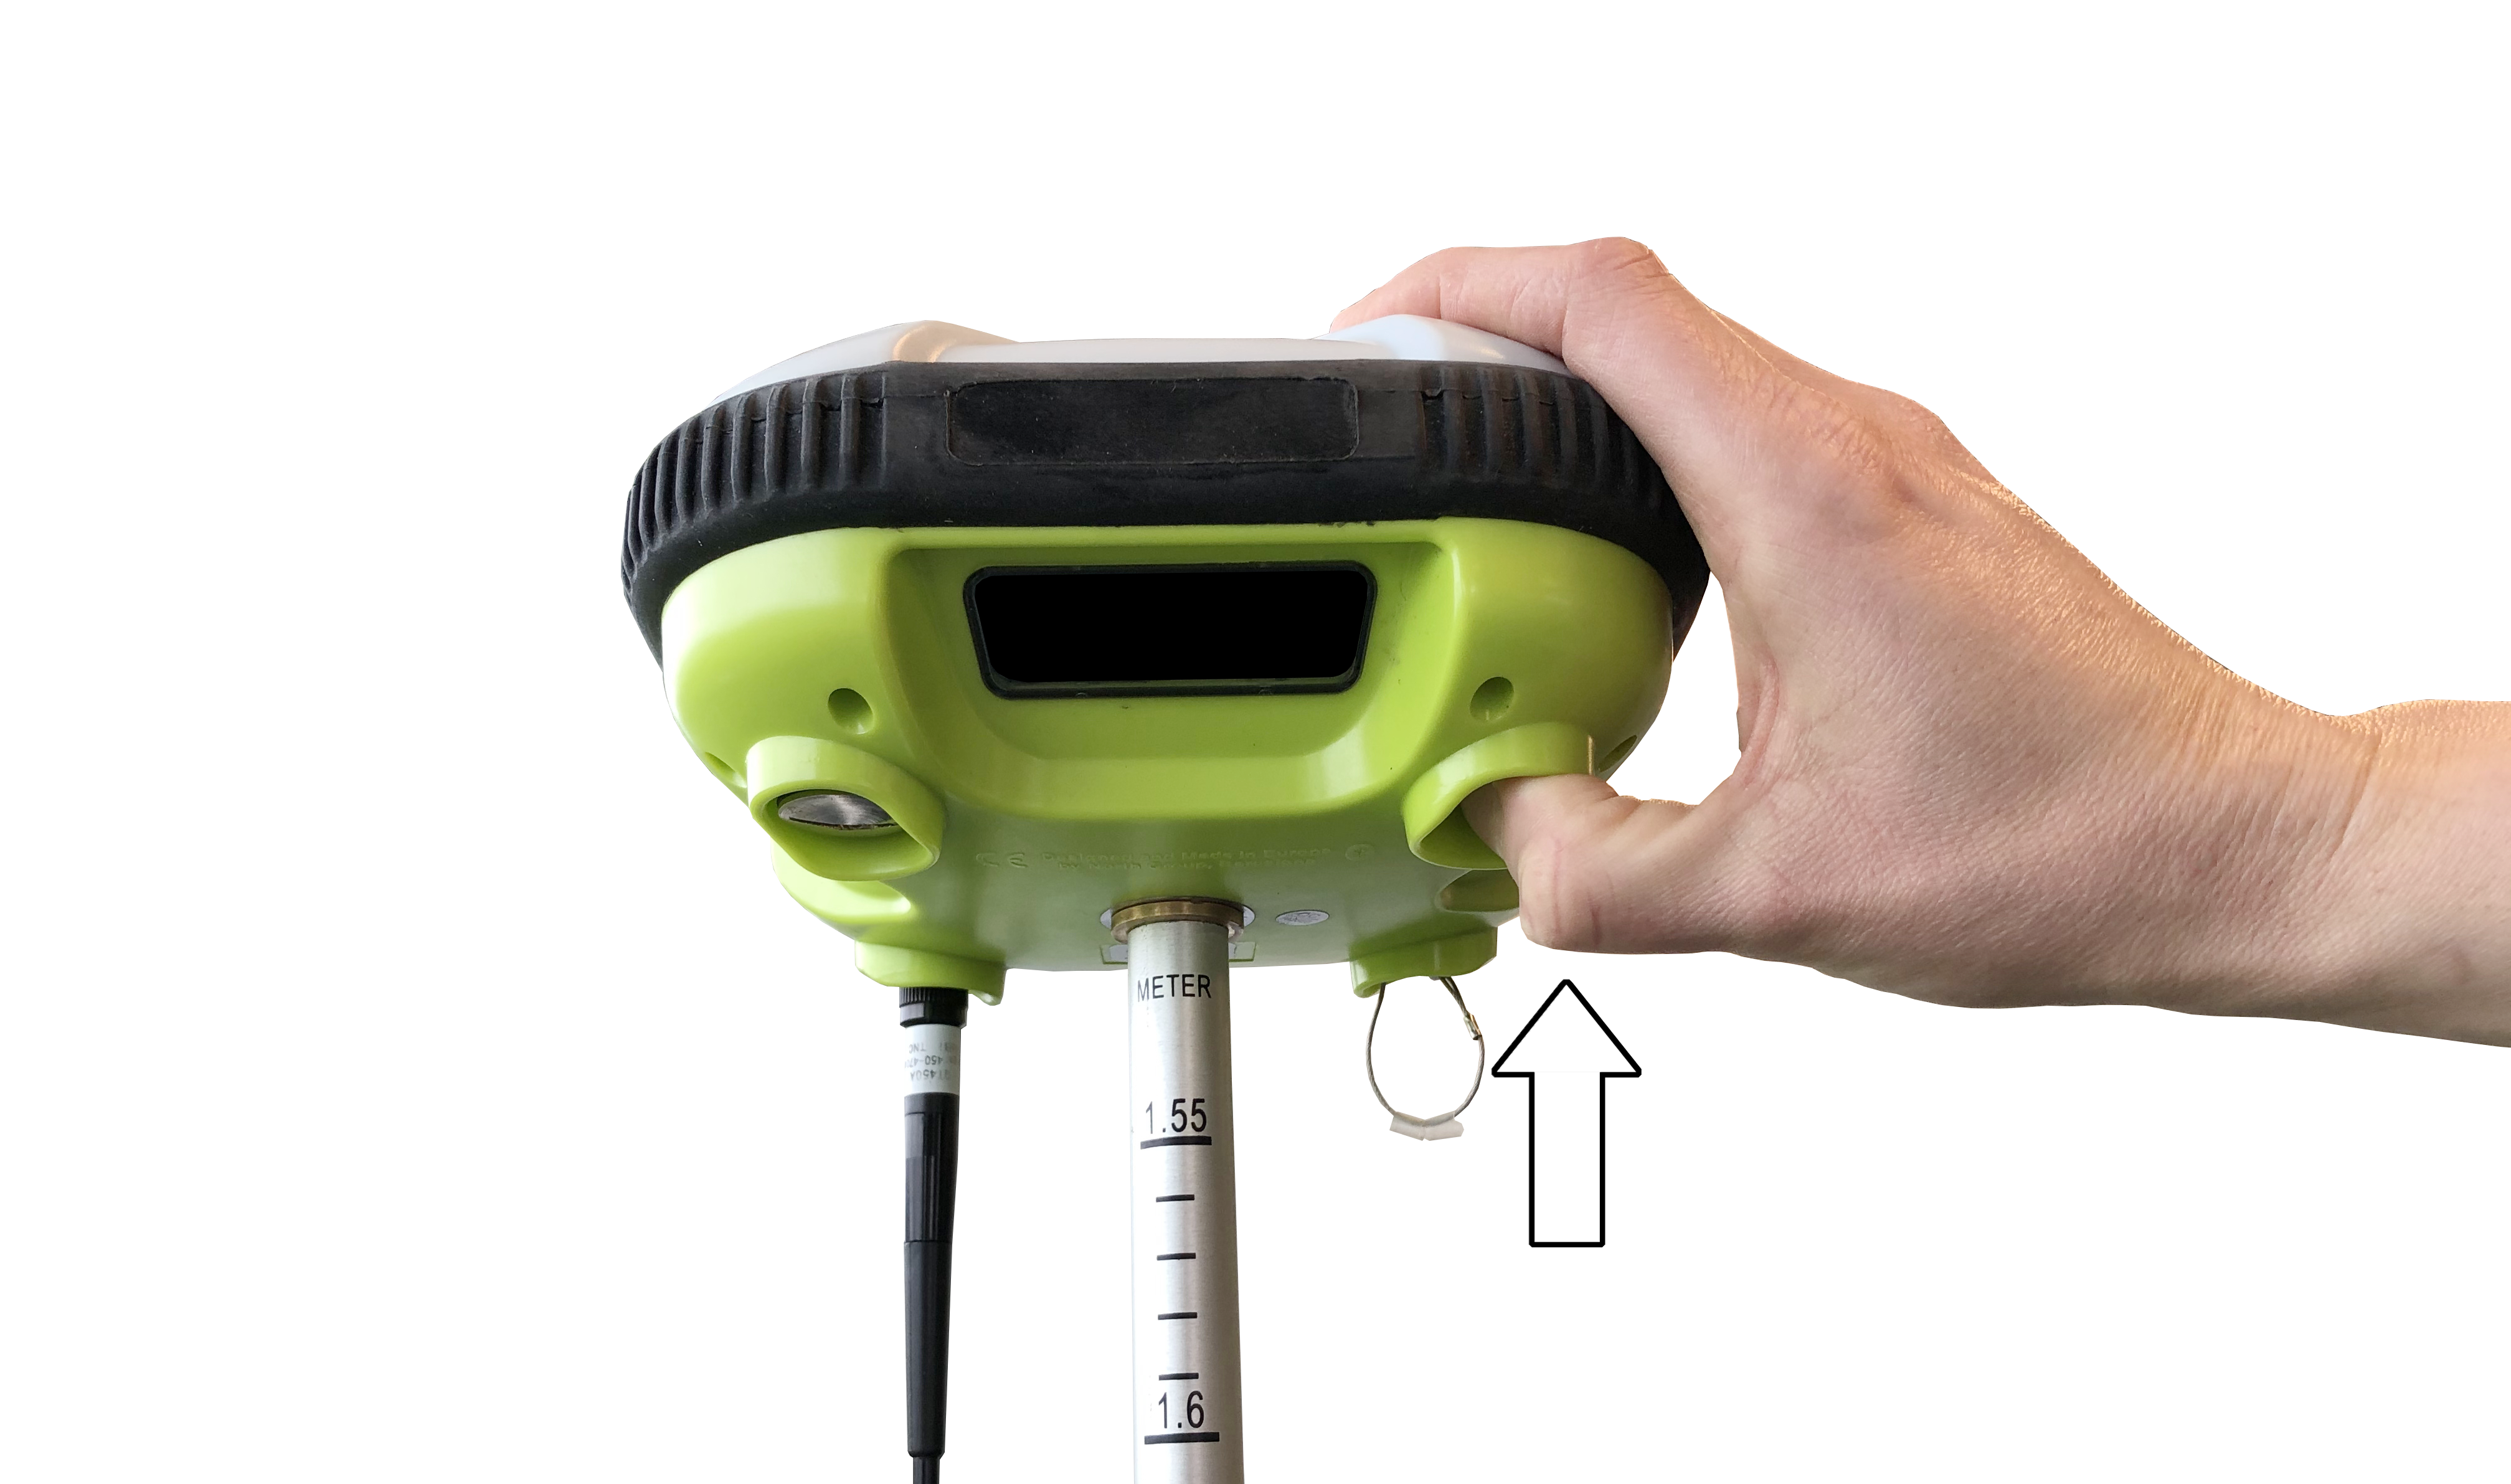
2. Release when the Base Station makes a “beep” sound.
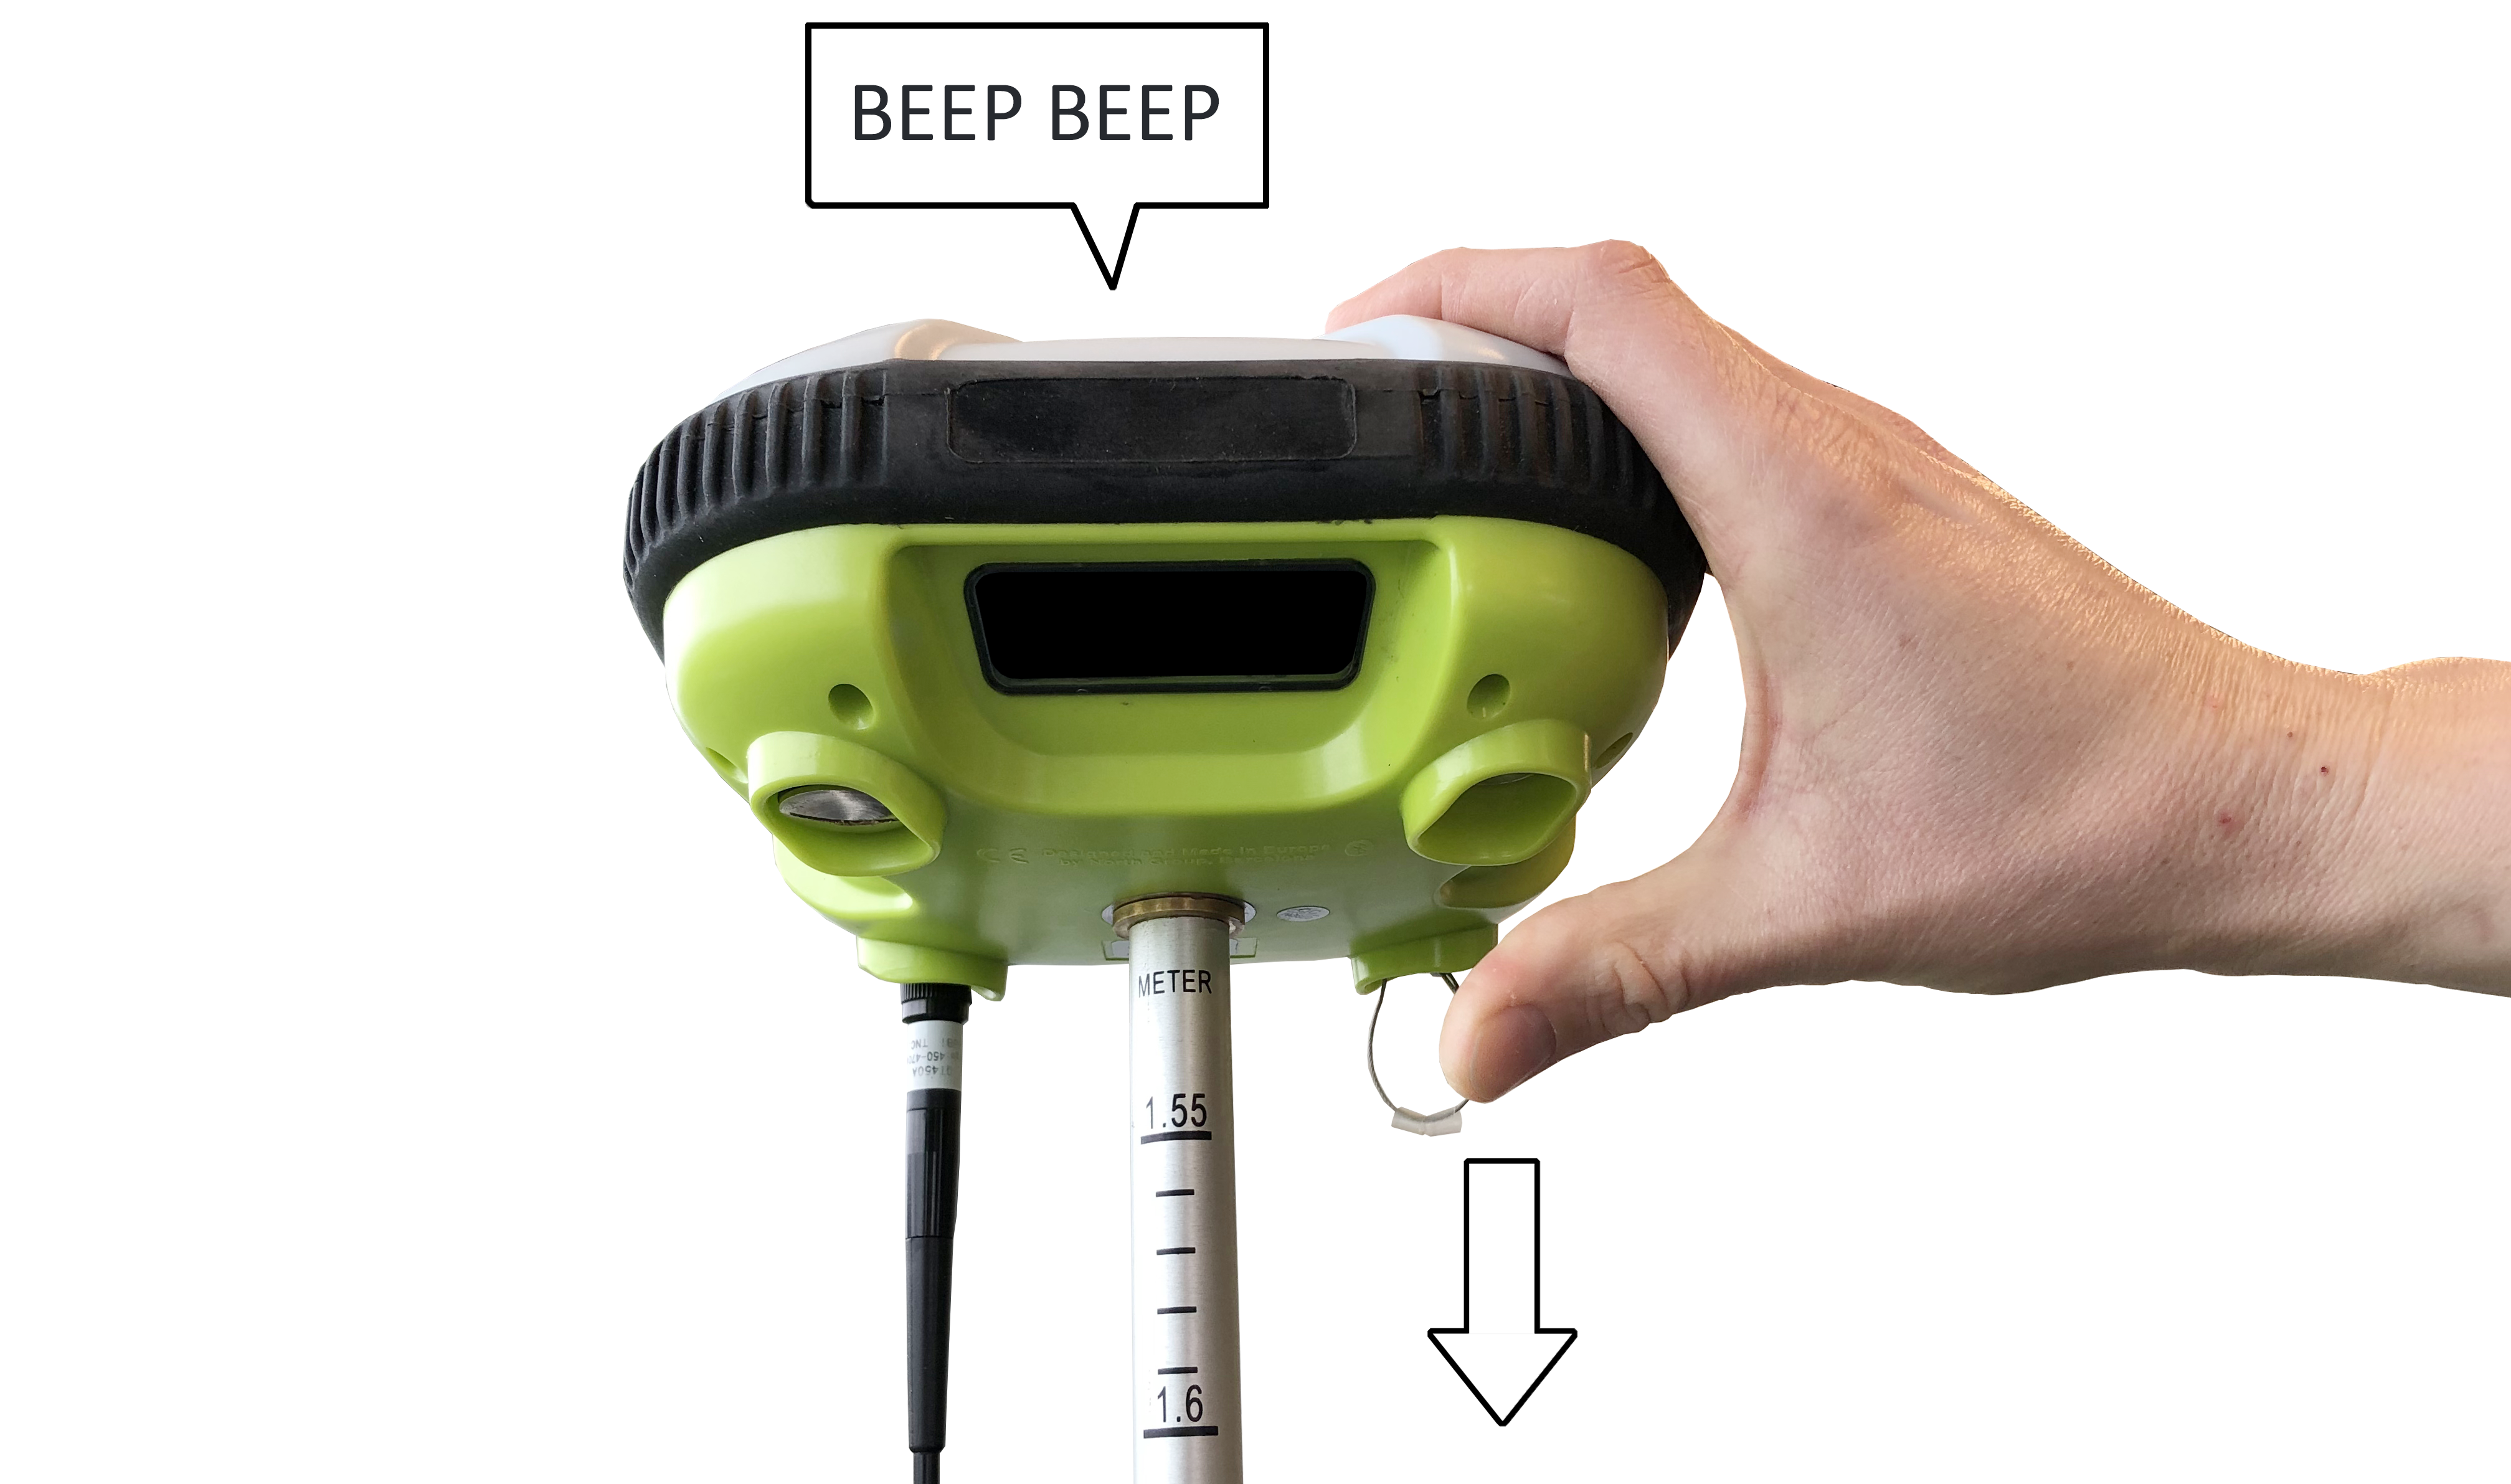
3. The Base Station will shortly after show the Home Screen.
# Check Position Mode
The Base Station's current Position Mode is checked in the following way:
1. From the Home Screen, press-hold on the push button to open the menu.
2. Navigate to “DEVICE INFO” by single pressing the push button and press-hold select.
3. Navigate to “POSITION MODE” by single pressing the push button.
Under “POSITION MODE” the active position mode is stated.
Ensure that the display says:
4. Navigate to "BACK TO MAIN MENU" by single pressing the push button and press-hold to select.
5. Navigate to "BACK TO HOME SCREEN" by single pressing the push button and press-hold to select.
# Check Status On Home Screen
On the Base Station's Home Screen check the following:
- Ensure that the display says "BASE UHF INT".
- When combining the number next to G, R, C, and E it is approx. 15 or more.
This is the number of satellites which the Base Station is connected to. - Ensure that the display shows in the lower right corner:
This means that the Base Station is transmitting by UHF radio frequency.