# Charging The Base Station
The Base Station can be charged using the following products:

Please note
- For charging the Base Station, the needed items are located in the Accessory Box.
- The Base Station can be charged while ON or OFF. If ON while charging, the Base Station remains fully functional and capable of connecting to both satellites and the Turf Tank One.
- If the Base Station is OFF while charging, there is no visual identification showing that the Base Station is charging.
- If the Base Station is ON while charging, the OLED Display will show a Plug icon to the left of two battery icons.
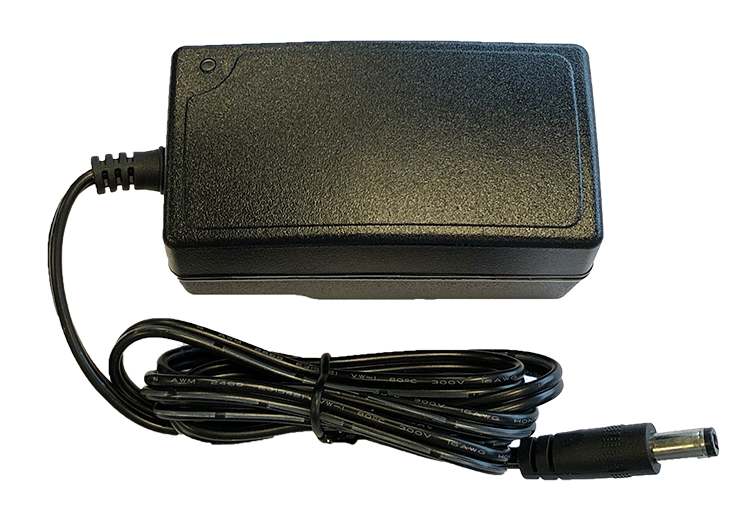
# Charging With The Charger
1. Slide the plug adapter into the power adapter.

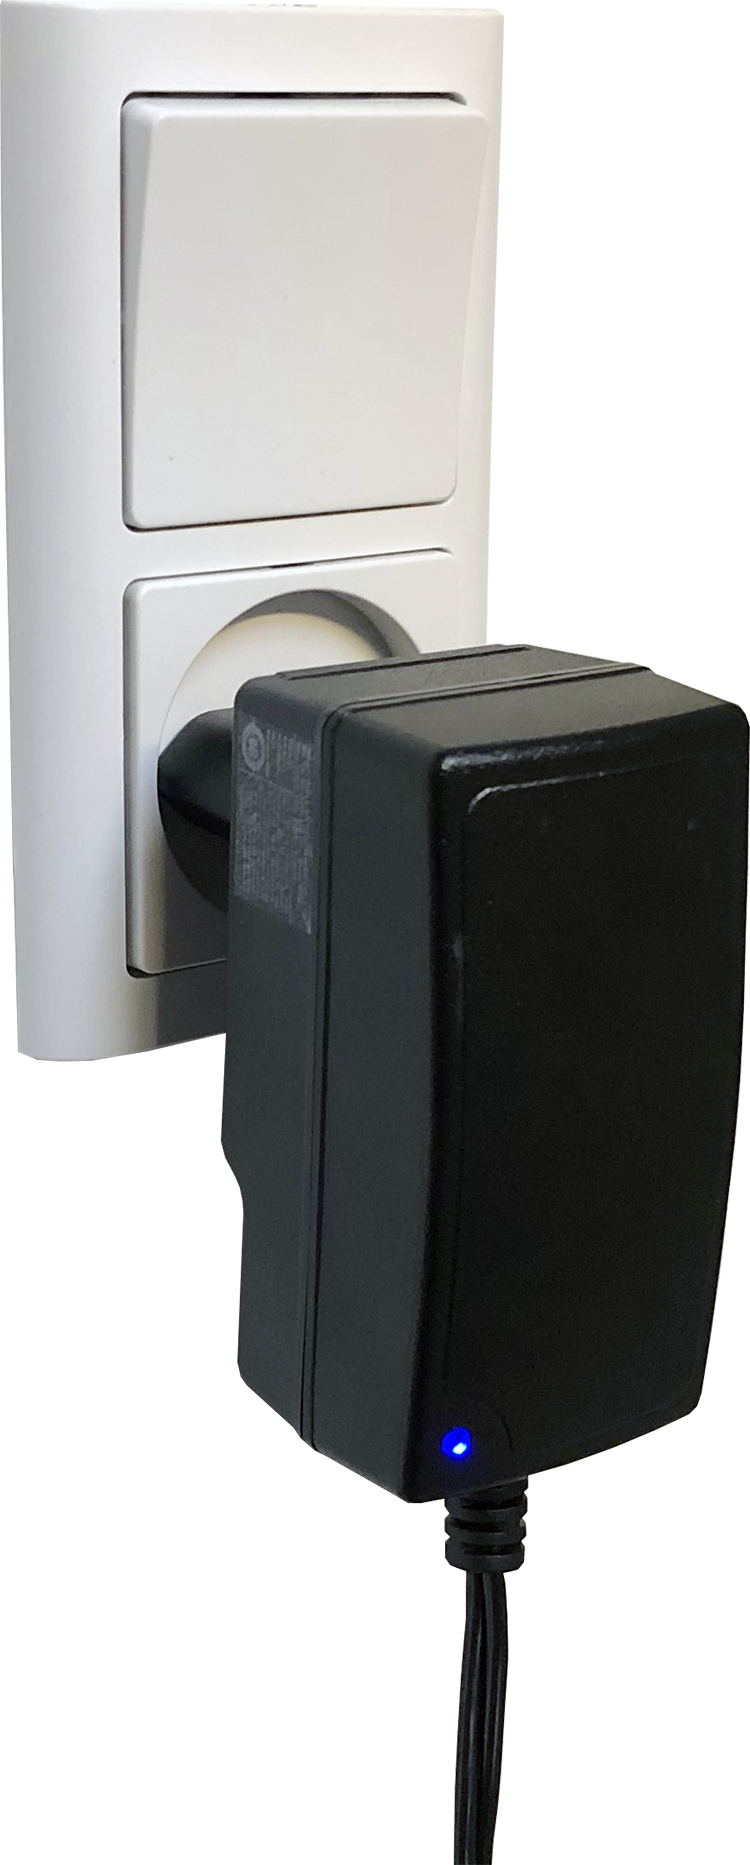
2. Connect Power Adapter to a Power Outlet.
When plugged in to a power outlet, the Indicator Light on the Power Adapter will turn ON (blue).
3. Remove the protective pin.
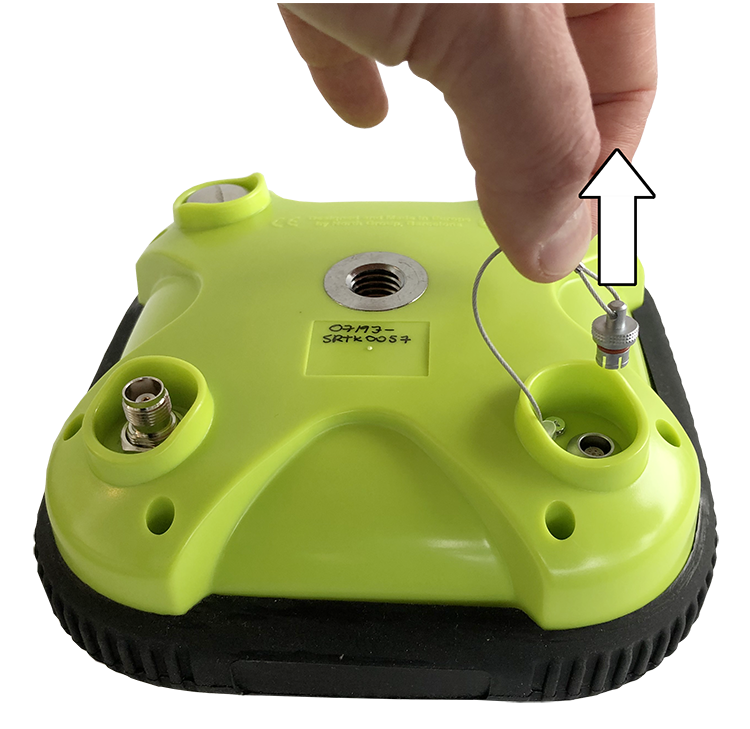
4. Connect the Charging Cable to the Base Station's charging port. Align red dot on the Charging Cable with the red line on socket of the Base Station charging port.

5. When finished charging, pull the Charging Cable up to remove.
Please note
To remove the plug from the Base Station, simply grip firmly around the red area shown on the image to the right and pull in the direction of the red arrows.
Align red dot on the Charging Cable with the red line on socket of the Base Station charging port.

6. Mount the protective pin on the charging port. Align red dot on the Charging Cable with the red line on socket of the Base Station charging port.

# Charging With The Jumper Cable
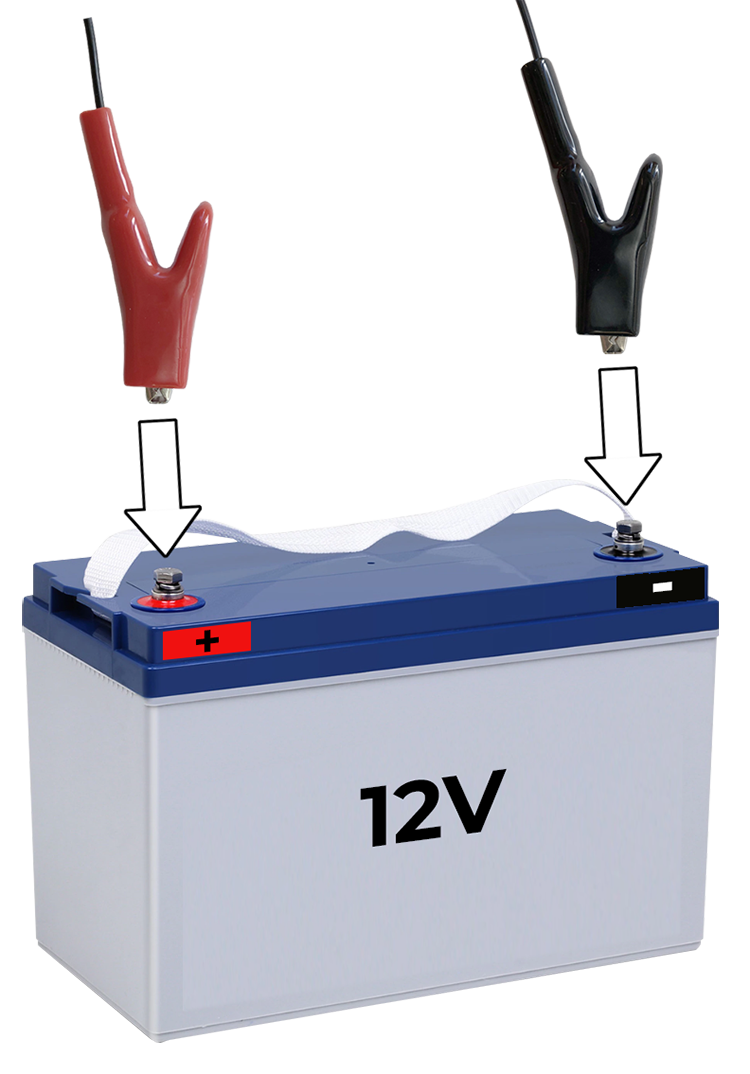
If a fixed power supply is not available, it is possible to extend the operating time of the Base Station by using an external 12V battery as power supply.
Please note
When using the Base Station Jumper Cable for external power supply it is of paramount importance that the supply delivers no more than 12V. 12V Gel battery is recommended. These are typically used on mopeds/motorcycles.
1. Attach the jumper cable's red wire to the plus (+) terminal on the battery and the black wire to the minus (-) terminal.
2. Slide the plug adapter into the power adapter.
3. Remove the protective pin.
4. Connect the Charging Cable to the Base Station's charging port. Align red dot on the Charging Cable with the red line on socket of the Base Station charging port.
5. When finished charging, pull the Charging Cable up to remove.
Please note
To remove the plug from the Base Station, simply grip firmly around the red area shown on the image to the right and pull in the direction of the red arrows.
Align red dot on the Charging Cable with the red line on socket of the Base Station charging port.
6. Mount the protective pin on the charging port. Align red dot on the Charging Cable with the red line on socket of the Base Station charging port.