# Update Turf Tank One via USB
# Updating The Software
To use the latest features and developments, it is necessary to update both the Turf Tank One and App to their latest versions. It is important to note that these versions need to match to ensure best performance. For updating the Turf Tank One's software the following is needed:
- Computer (with an internet connection)
- USB Memory Stick (located in the Accessory Box)
- USB-A to USB-Mini Adapter (located in the Accessory Box)
- The Turf Tank One
TIP
Whenever updating your tablet app to any version later than 1.5 you will now be asked if you want to update your robot wirelessly and will normally not have to do manual USB updates.
Please Note
The USB Stick must be FAT32 file system to ensure it can be read by the Turf Tank One. Under normal circumstances, the USB Stick is FAT32 and ready to use.
1. Insert USB Memory Stick into the computer's USB port.
2. Delete all data on the USB stick.
3. Download the latest update for the robot to your USB Memory Stick
This can be found on this page: Software Updates.
You want to download the update for the robot, not the tablet.
Save the file to the root of the USB Memory Stick.
check filename is correct before ejecting
USB updates for the robot has to be named inmark-update.tar.gz.cpt for the robot to recognize the update. If the file is named differently, rename it to the above.
4. Eject the USB Stick and mount the USB stick on the USB Adapter.
Please Note
- Shown USB Memory Stick may be different from shipped version.

5. Make sure that the Turf Tank One is turned OFF and battery is inserted.
If the Turf Tank is ON, turn the key counterclockwise (to OFF position) to turn OFF the Turf Tank One.
The Main Switch does not need to be turned OFF.

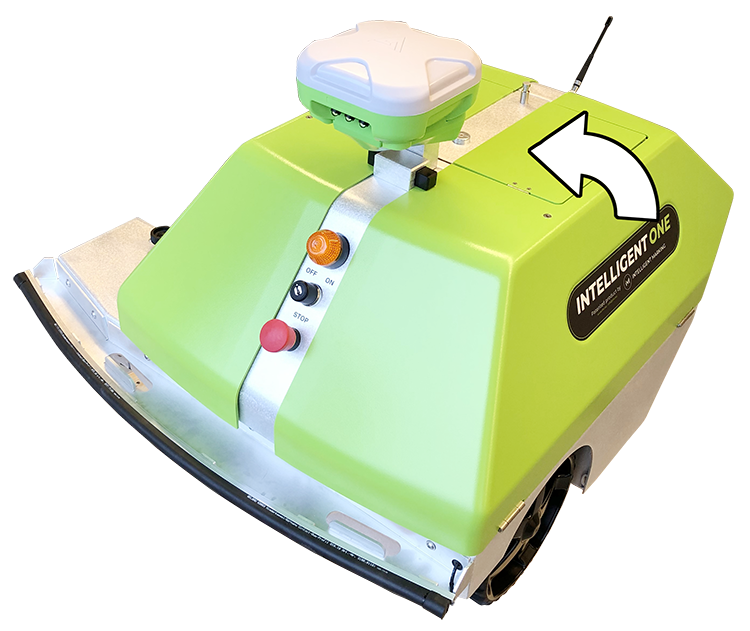
6. Push in Hatch Lock for left Side Hatch.
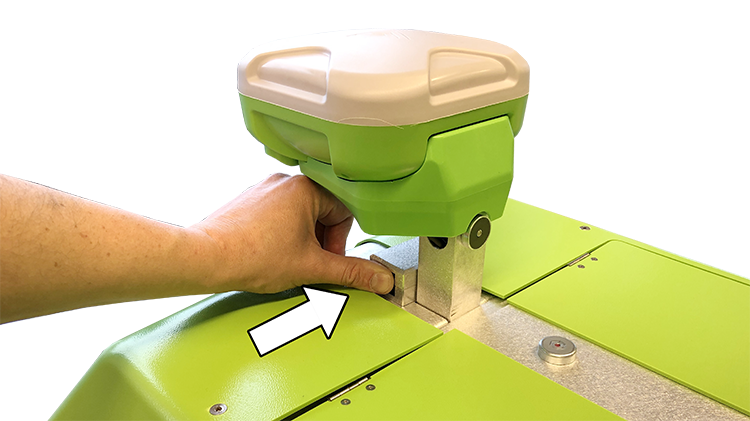
7. Open left Side Hatch.
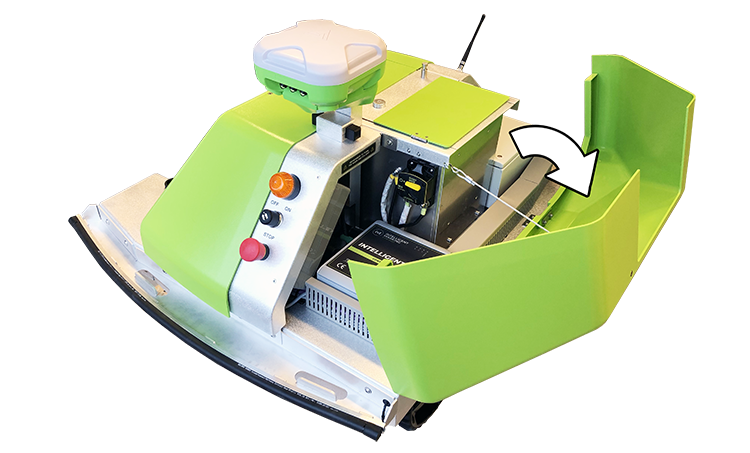
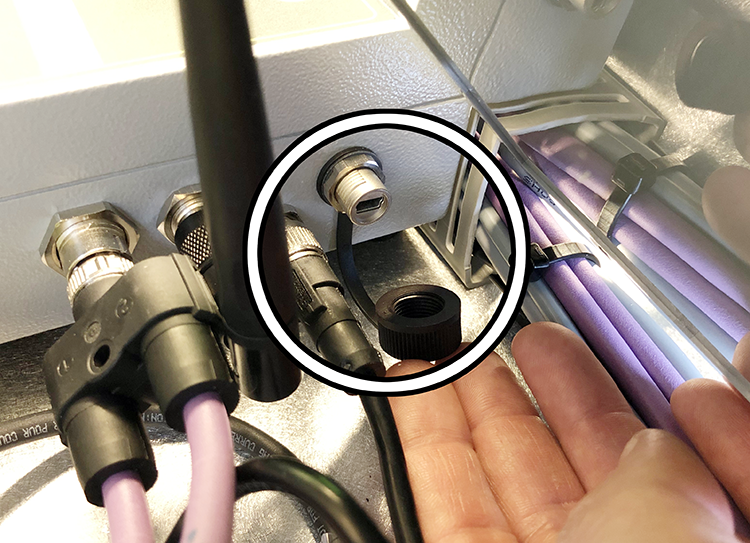
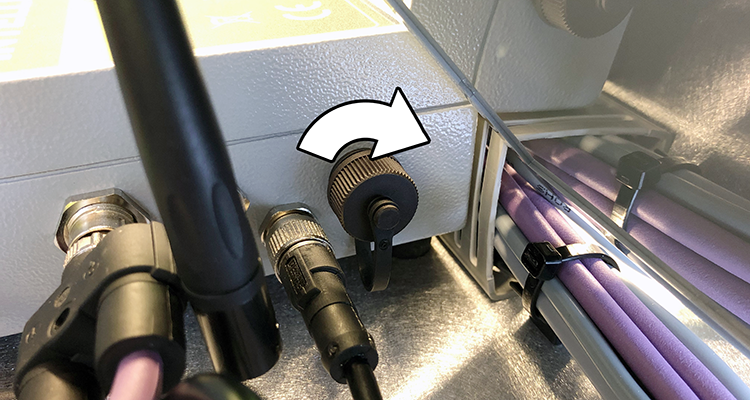
8. On the Controller, unscrew the black protective cap with a counterclockwise rotation.
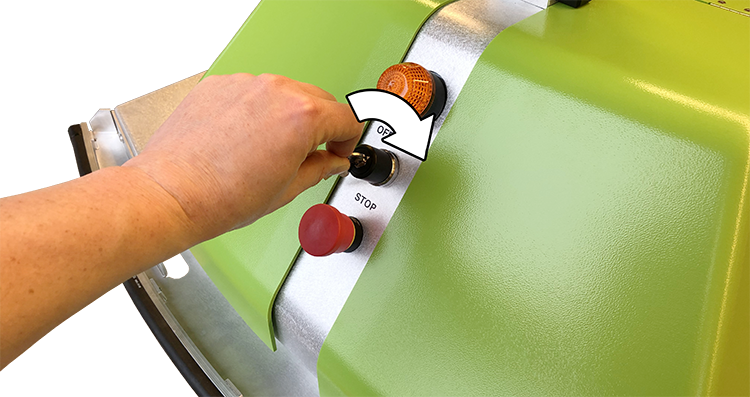
9. Turn Turf Tank One ON by turning the key clockwise (to ON position)
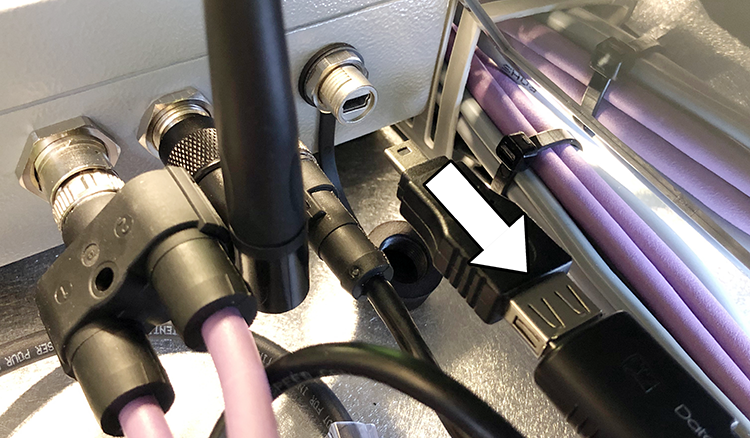
10. When the Main Indicator Light starts to blink insert the USB Stick into the USB port.
The Main Indicator Light will afterwards turn OFF.
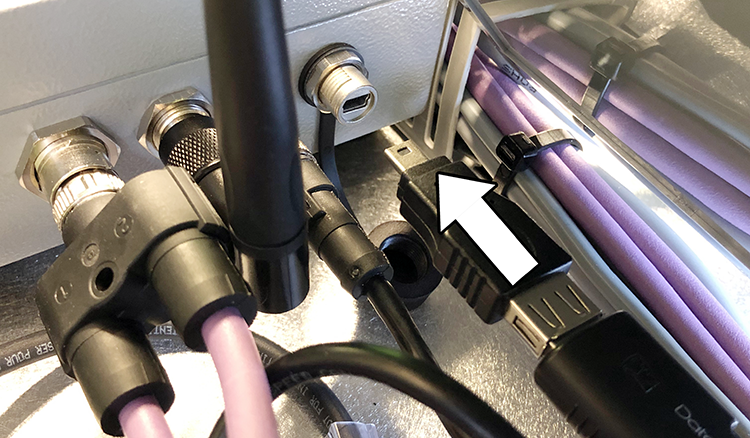
11. When the Indicator Light starts to blink again pull out the USB Stick
12. Screw the black protective cap back on with a clockwise rotation.
13. Close left Side Hatch.
14. Establish Wi-Fi connection between Tablet and Turf Tank One.
How to establish Wi-Fi connection is shown here:
Tablet Connection
15. On the Tablet, open the App
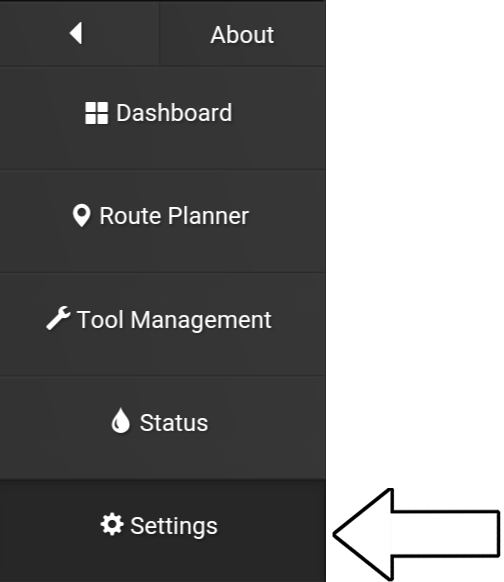
16. Go to “Settings”
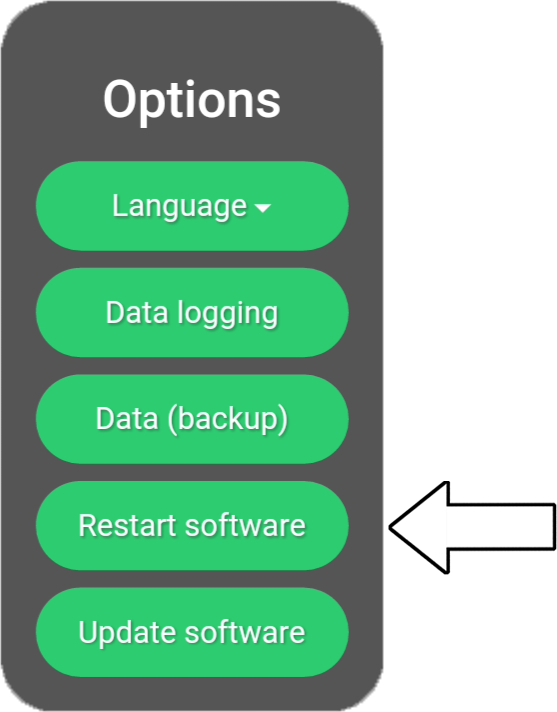
17. Under “Options” Choose “Restart software”.
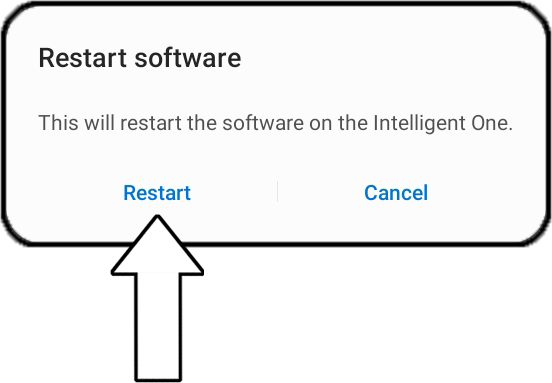
18. Press “Restart”.
The Turf Tank One will now reboot and the new software is now installed.
important
When you have finished updating your robot, always verify that the version has installed successfully!
Go to Check Software Version to make sure the update installed correctly. Please note that in some cases it is not expected that the version number changes!
To better understand the versioning scheme used for updates, please to go About Software Versions.