# Updating The 7-Pin Base Station
This tutorial covers how to update the software on the 7-Pin Base Station.
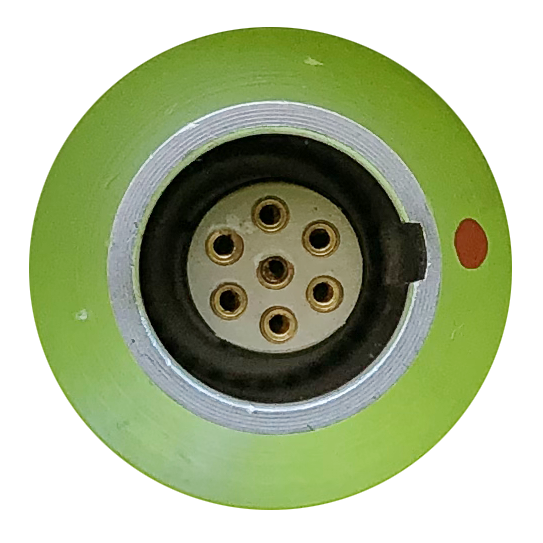
The 7-pin Base Station is identified by the number of pin holes on the Base Station´s Charge Port.
The 7-Pin Charge Port is shown below.
please note
The software needed for updating the 7-pin Base Station is found here:
Base Station Updating Tool
# Required items
The following items are required to update the Base Station.
| Item | Image |
|---|---|
| Base Station Charger | 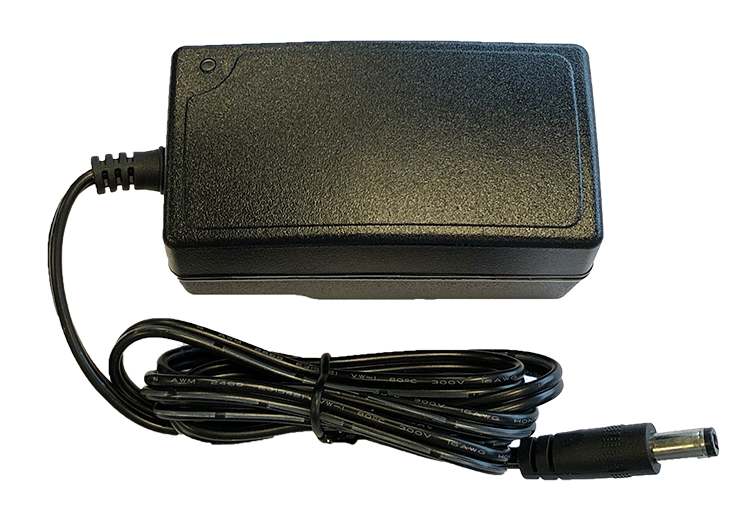 |
| Y-Cable |  |
| A Windows PC with Internet Connection | - |
important
The Y-Cable is not compatible with the 5-pin Base Station.
# Prerequisites
In order to update the Base Station you will need to have the correct driver installed on your Windows PC. If you have Windows 10 it should automatically install the needed driver once the Y-Cable is plugged into an available USB Port.
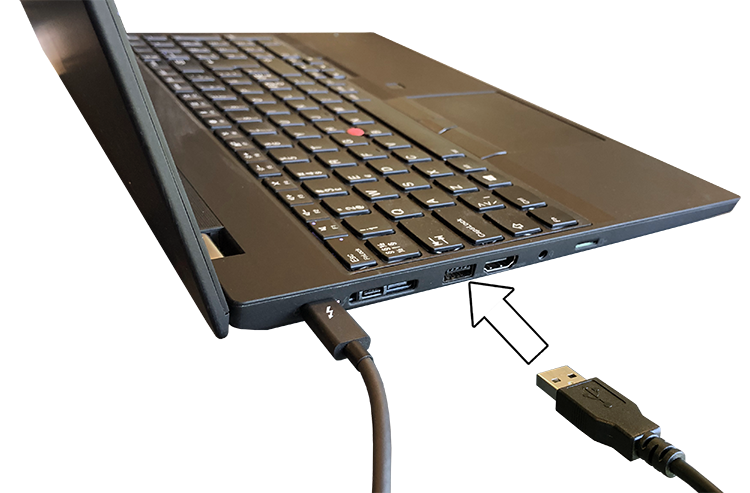
1. Connect the Y-cable to an available USB Port on your PC.
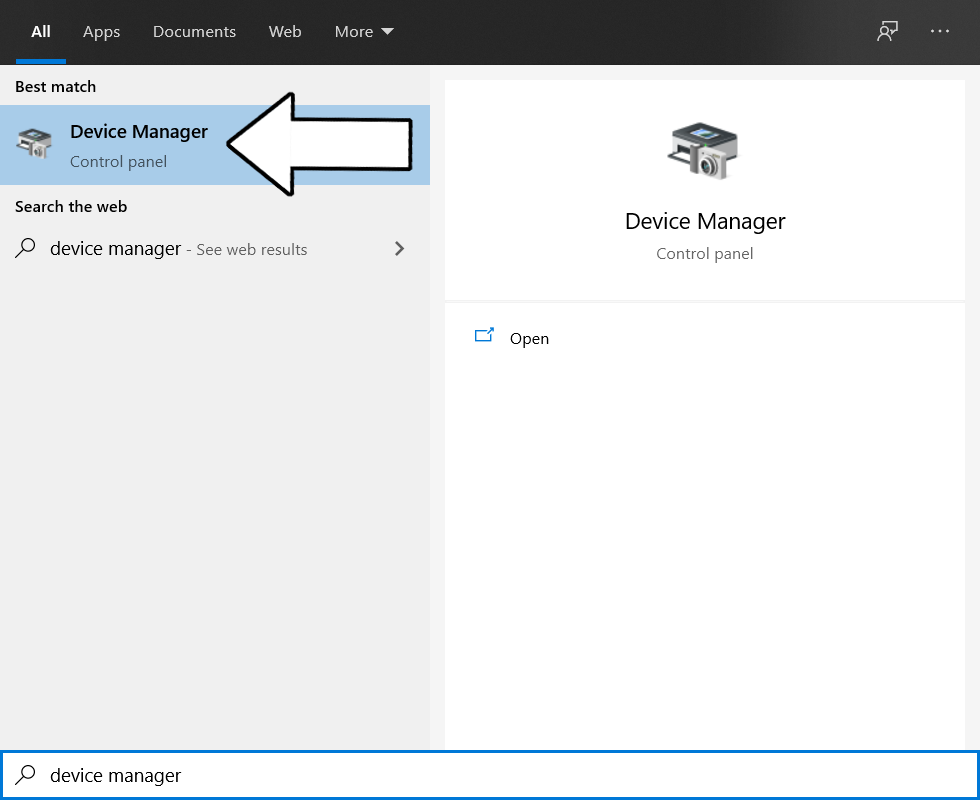
2. Press the Windows Start Button on the task bar or press the Windows key on the keyboard.
The Windows key is commonly placed to the left of the space bar.
3. Type "Device Manager".
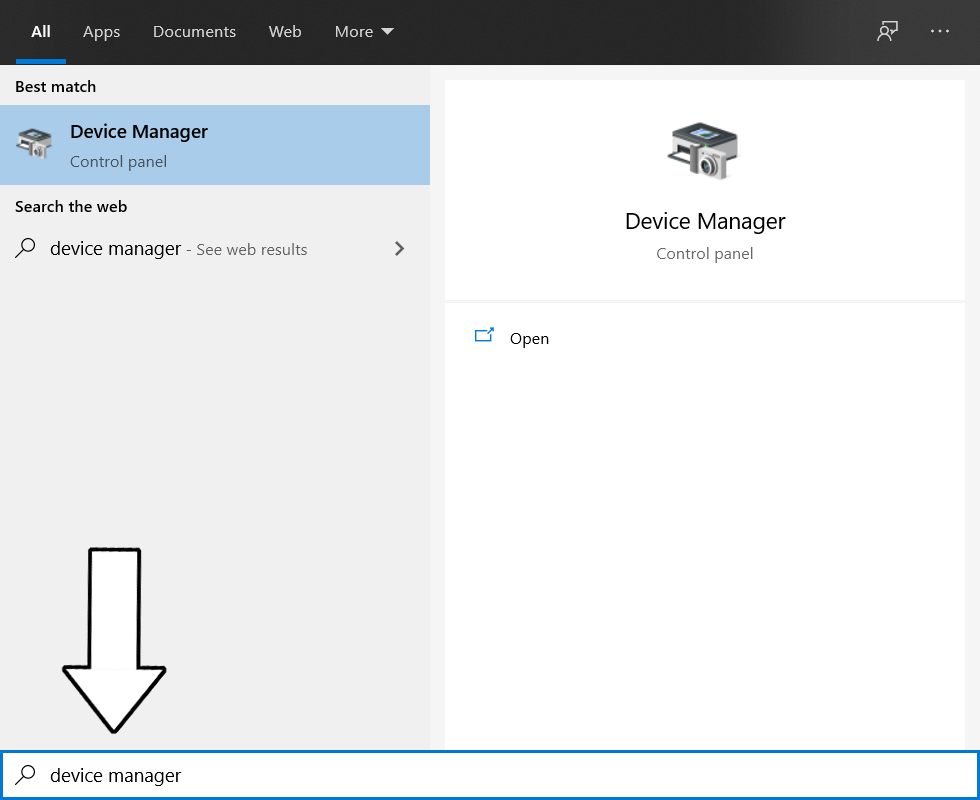
4. Select "Device Manager" to open.
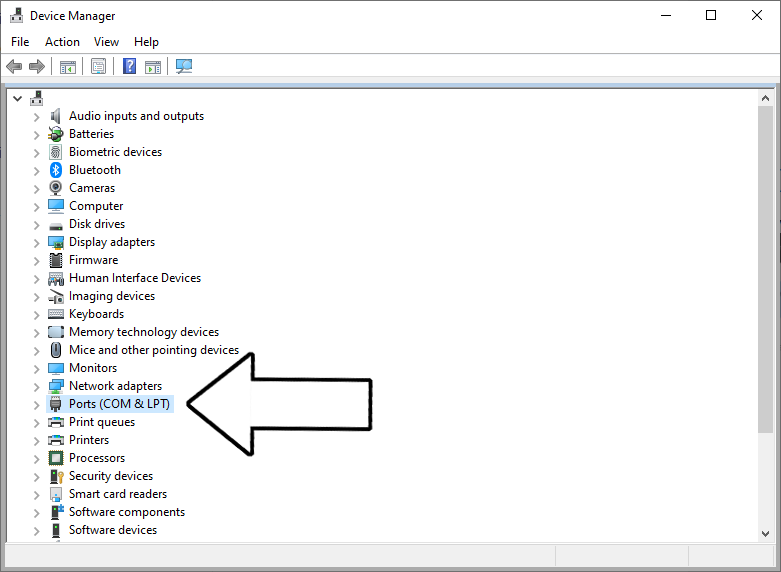
5. Expand "Ports (COM & LPT)".
This menu item may not be displayed if the Y-Cable is not connected.
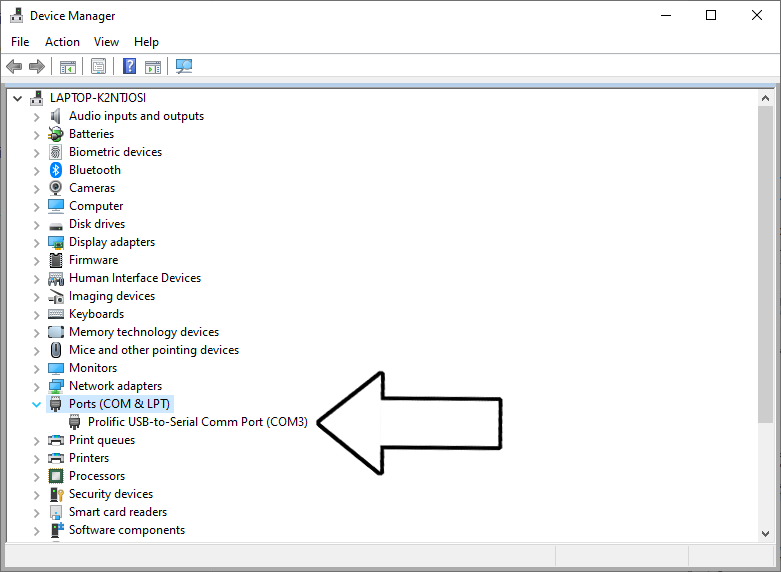
4. Ensure that it says "Prolific USB-to-Serial Comm Port".
Pay attention to the listed Port name.
For example, the Port name can be COM3.
important
If an exclamation mark (!) is shown next to the Prolific device it means that the driver is not installed. If this is the situation please follow the steps described below.
If no exclamation mark is shown then continue with the updating process described here:
Updating Process
1. Ensure that you have downloaded the Driver Installation from here:
USB-to-Serial Driver (opens new window).
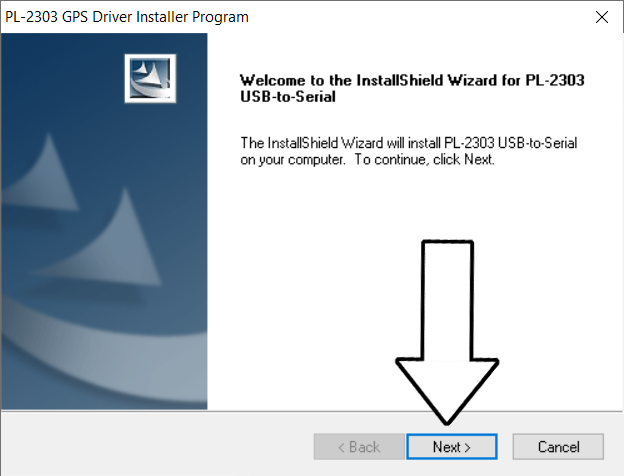
2. Double-click to open the program.
3. Press "Yes", if you receieve the message "Do you want to allow this app from an unknown publisher to make changes to your device?
4. Press "Next".
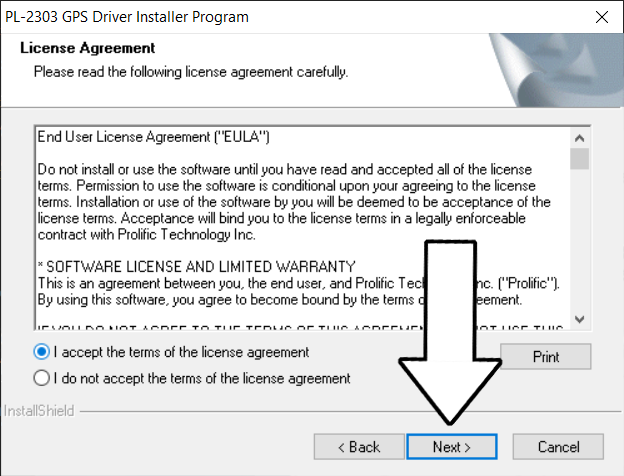
5. Select "I accept the terms of the license agreement. 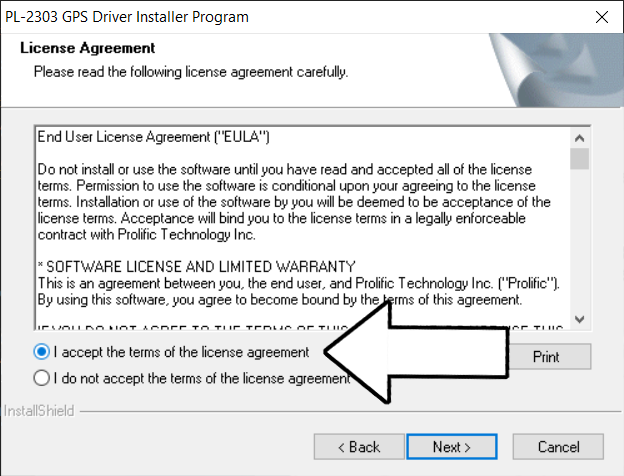
6. Press "Next".
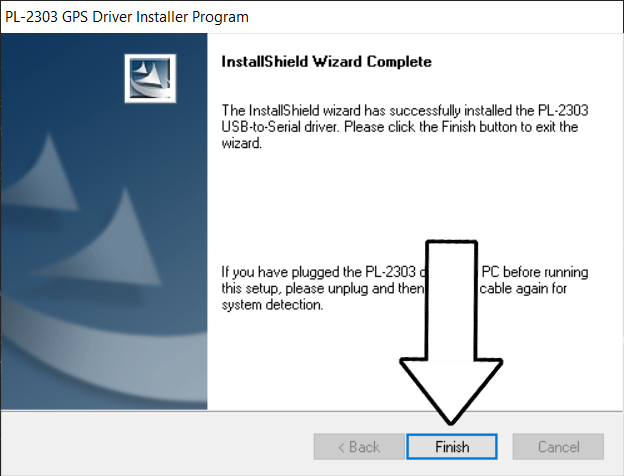
7. Press "Finish" once the installation is complete.
# Updating process
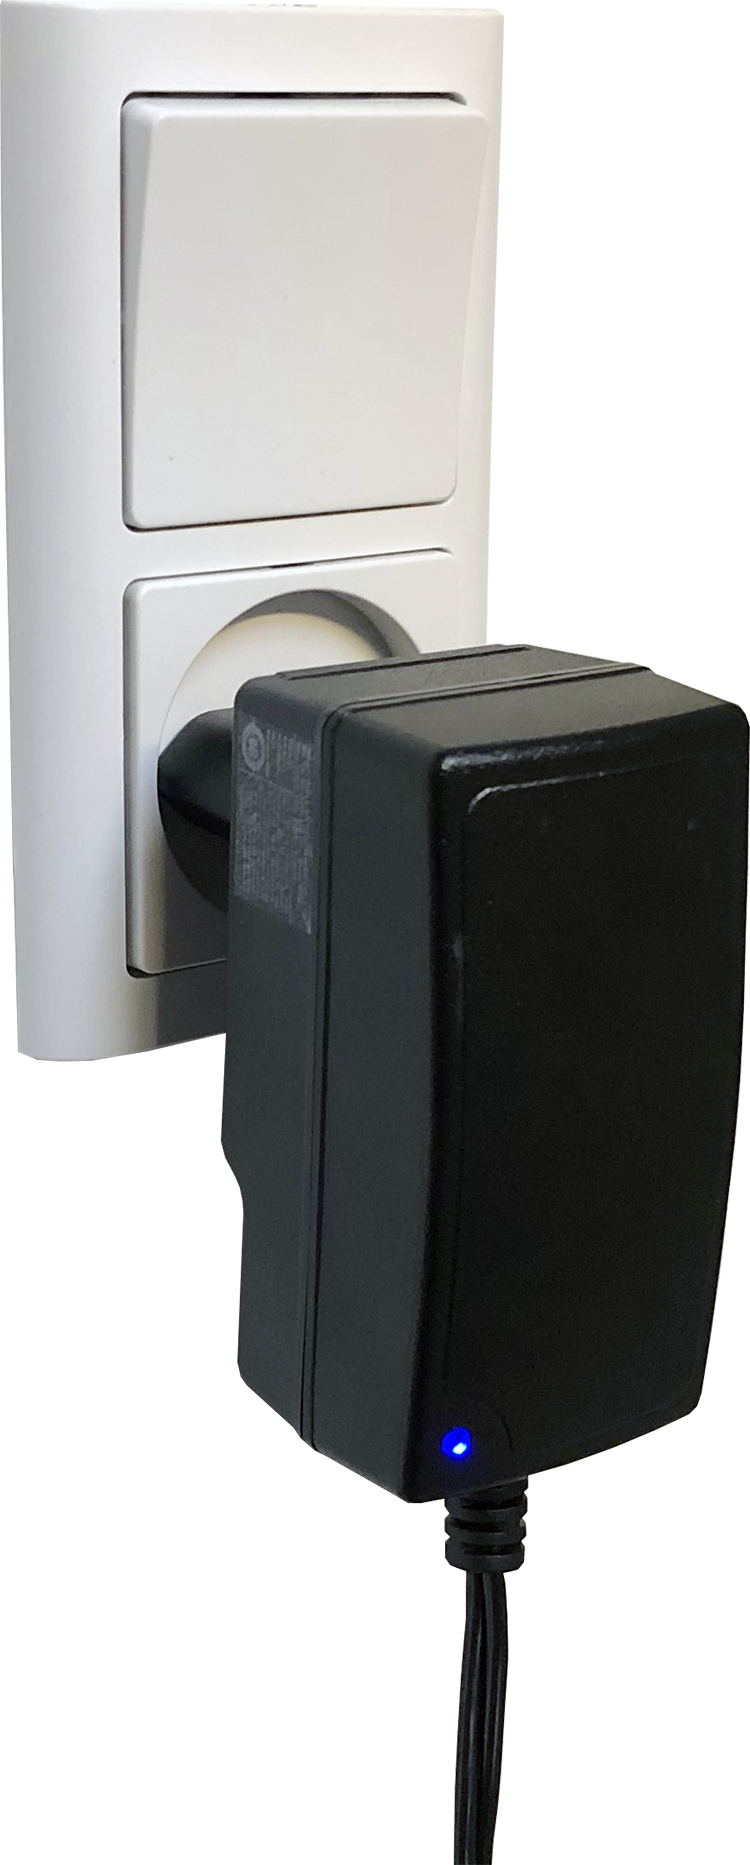
1. Connect the Charger to a Power Outlet.
Ensure that the Power Adapter´s Indicator Light is ON (blue).
2. Connect the Y-Cable to the Base Station Charger.

3. Connect the Y-Cable to an available USB Port on your Windows PC.
4. Remove the protective pin.
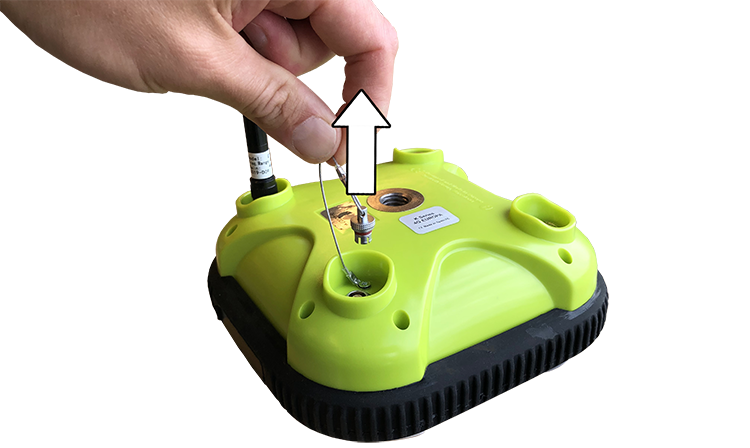
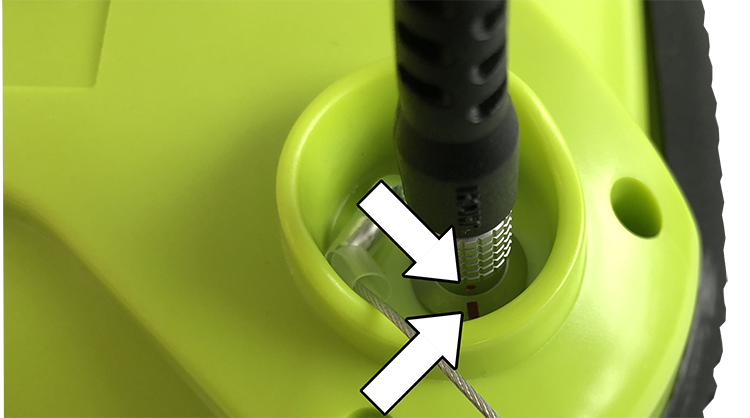
5. Connect the Y-Cable to the Base Station's charging port.
Align the red dot on the Charging Cable with the red line on the socket of the Base Station´s Charging Port.
6. Press-hold the Push Button in the Base Station for 15 seconds.
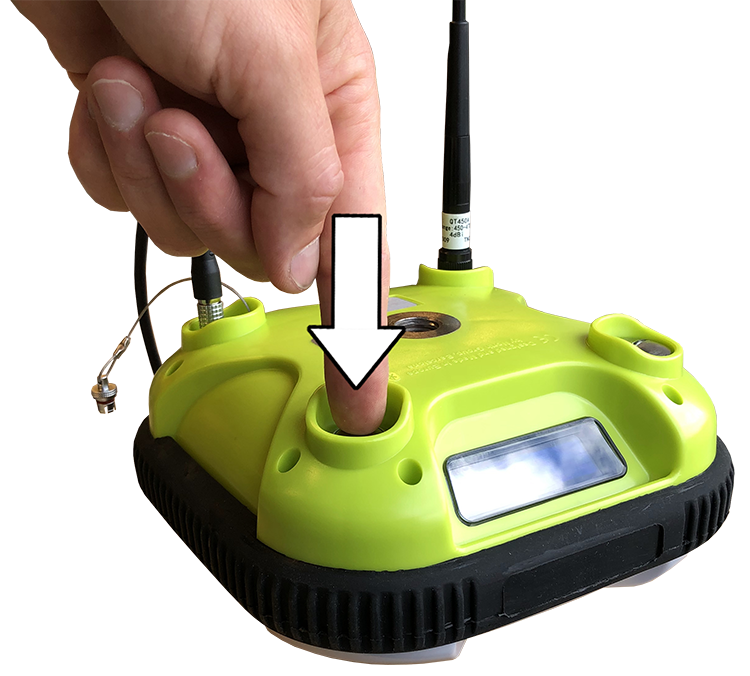
When it stops beeping the display will show "UPDATE MODE".

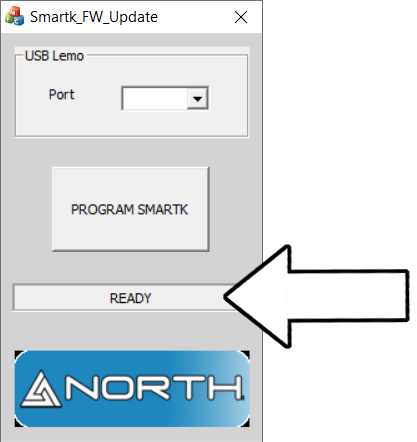
7. Double-click on the "SmaRTK firmware update tool" to open the program.
important
You may receive a notification saying "Windows protected your PC".
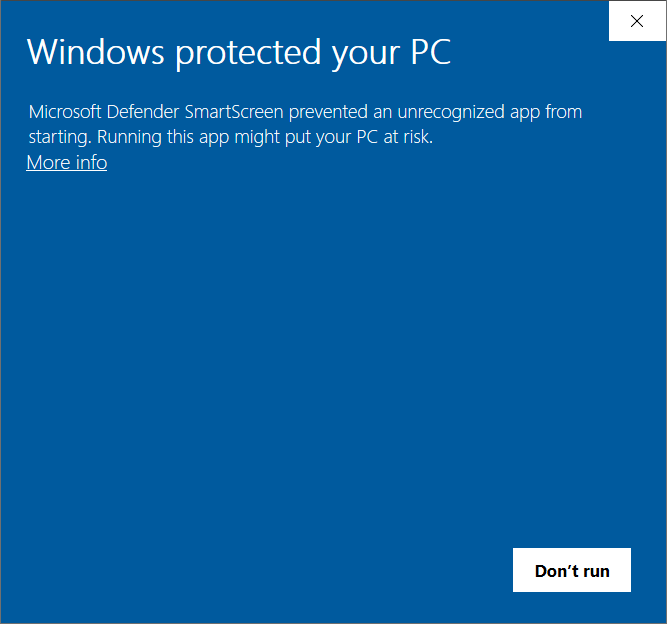
If this is the situation please following the steps below.
1. Select "More info".
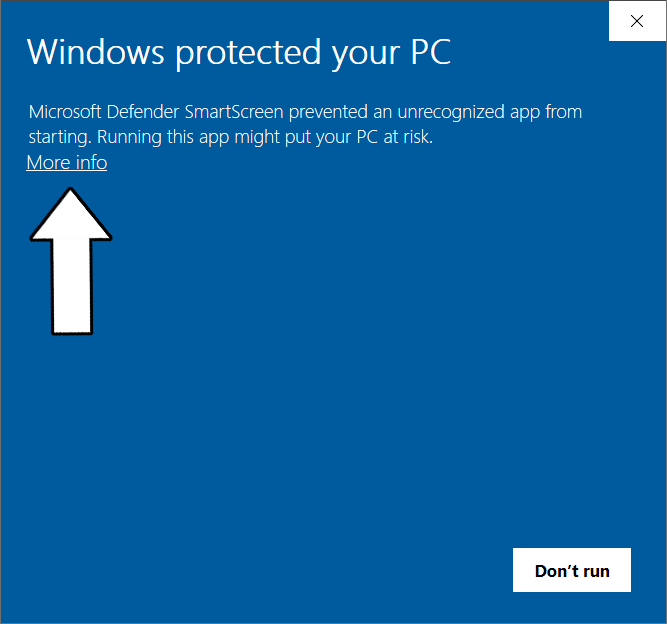
2. Select "Run anyway".
The program will afterwards open.

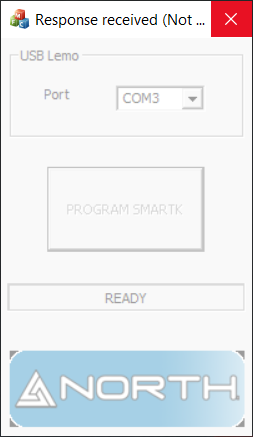
8. Ensure that is says "READY".
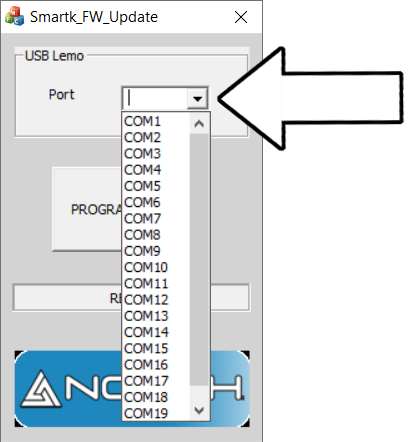
9. Expand the Port list and select the correct COM Port.
The COM Port must be identical to the listed name for the "Prolific USB-to-Serial Comm Port".
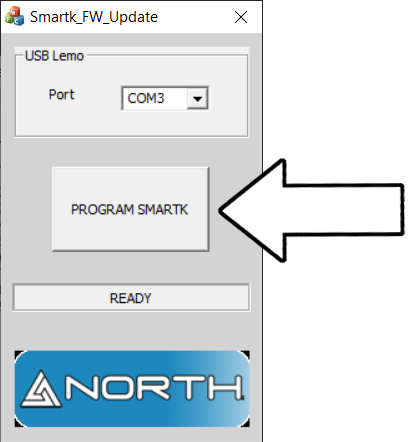
10. Press "PROGRAM SMARTK" to start updating the Base Station.
important
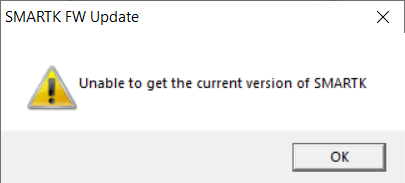
- Having pressed the "PROGRAM SMARTK" button the updating process will take approx 3-4 minutes to complete.
- If the program displays "Unable to get the current version of SMARTK" then press "OK" followed by "PROGRAM SMARTK" again. Repeat if necessary.
- If the issue continues check if the screen still says "UPDATE MODE".
If not, press-hold the Push Button to enable "UPDATE MODE" again.
- If the program displays "Not responding" the update process is still actively running.
If you experience this just let the updating process continue and wait until the Base Station turns off.
11. When the updating is started it will say "PROGRAMMING" in progress bar.
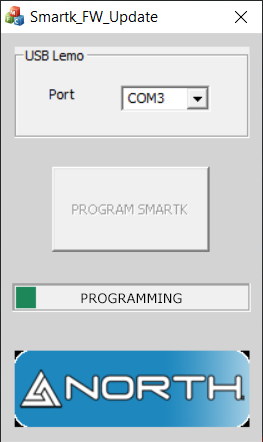
12. When the updating process is done the Base Station´s screen will turn OFF.
13. To check if the software is updated correctly turn ON the Base Station and look for the software version which is displayed together with "SMARTK SMARTOS" during start up.

Alternatively, checking the software version is also described here:
Check Firmware Version